
In This Article
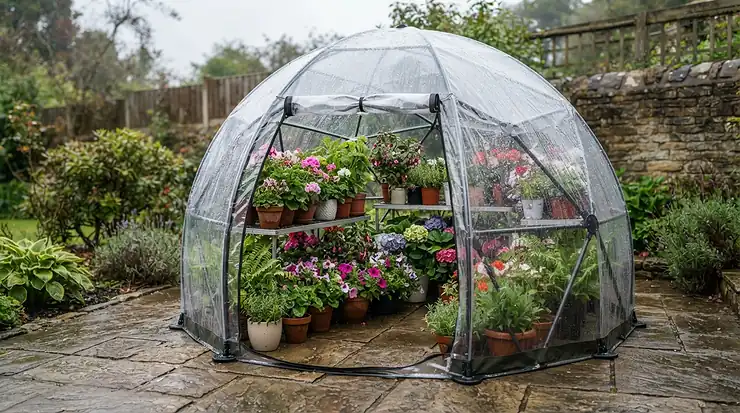
A pop-up greenhouse is a lightweight, tent-style growing shelter built on a collapsible frame and covered in clear or translucent polyethylene. It unfolds in minutes without tools, traps solar heat, shields plants from frost, wind and rain, and packs flat for storage. For most backyard growers it is the fastest way to stretch a short season.
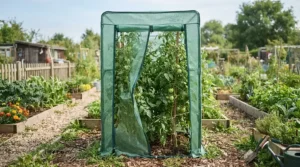
The idea is old. A greenhouse is simply a structure that regulates the temperature and humidity around plants, and only in the 1960s did wide polyethylene sheeting make cheap, lightweight versions possible. The modern pop-up greenhouse is that idea shrunk to fit a balcony, a raised bed or a suburban lot.
The timing matters. It is mid-October 2026, and in many parts of Canada the first hard frost has either arrived or is hovering. Commonly cited averages put Calgary’s first frost around mid-September and Toronto’s around the first week of October. Vancouver gets a gentler runway into early November. A pop-up greenhouse can’t turn Winnipeg into Victoria. It can buy you weeks on both ends of the season, and for a tomato plant that’s the difference between green fruit and a harvest.
Below, you’ll find seven real models, an honest read of what buyers report, and practical guidance on setup, anchoring and Canadian growing calendars. We’ll also cover what a pop-up greenhouse can’t do, because that’s the part most listings skip.
Quick Comparison: Pop-Up Greenhouse Options at a Glance
| Product | Floor Size (approx.) | Setup Style | Best For |
|---|---|---|---|
| Eagle Peak 8×6 | 2.4 × 1.8 m | Centre-lock pop-up | Eagle Peak 8×6 suits most backyard growers |
| Eagle Peak 10×10 | 3 × 3 m | Centre-lock pop-up | Large veggie gardens and shelving |
| Yardsight 8.5×7 | 2.6 × 2.1 m | Pop-up walk-in | Hot, sunny sites needing airflow |
| Eagle Peak 6×4 | 1.8 × 1.2 m | Centre-lock pop-up | Balconies and first-timers |
| Outsunny 12x10x7 | 3.7 × 3 m | Collapsible tent-style | Big space on a modest budget |
| Ohuhu 48x48x64 | 1.2 × 1.2 m | Slot-together frame | Seedling shelves and herbs |
| AHOME Mini | Single-plant scale | Instant pop-up | Quick frost cover for one pot |
The table sorts the field by space, not just price. The Eagle Peak 8×6 is the sensible default because it is big enough to walk into and small enough to anchor properly. If you grow in bulk, the Eagle Peak 10×10 and the Outsunny 12x10x7 buy you room at the cost of wind exposure. The AHOME Mini and Ohuhu 48x48x64 are for shelves, seedlings and “save this one plant tonight” emergencies.
💬 Just one click — help others make better buying decisions too!😊
Top 7 Pop-Up Greenhouses: Expert Analysis
One note before the list. Three of the seven are size tiers of the same Eagle Peak platform, because that platform dominates current roundups. The other four take different approaches to the same problem. Prices are approximate Canadian-dollar ranges based on research at the time of writing. Availability on amazon.ca varies by size and colour, so check current listings.
1. Eagle Peak 8×6 — best all-round pop-up for fast setup
The Eagle Peak 8×6 earns its reputation on one trick: the centre-lock “Peak Push” system opens the frame in seconds, so one person can raise it alone.
The footprint is about 2.4 × 1.8 m (8 × 6 ft). That is enough for a pair of shelving racks with a walking lane, or a few large containers. The frame is steel and the cover is polyethylene, with zippered doors and roll-up mesh windows. The mesh matters more than it sounds. Ventilation is what stops a greenhouse from turning into a slow cooker on a sunny October afternoon.
Based on the spec comparison, this is the model for people who value time over square footage. Several independent roundups place it at or near the top for seasonal use and quick setup. Reviewers repeatedly highlight the ease of assembly, while the usual caution applies: a lightweight frame needs real anchoring in wind.
Pros:
- ✅ Genuinely one-person, tool-free setup
- ✅ Roll-up doors and mesh windows for airflow
- ✅ Packs down for off-season storage
Cons:
- ❌ Needs proper anchoring in exposed yards
- ❌ Thin cover won’t survive harsh winters
Expect a price somewhere around C$200-C$280, depending on cover colour and retailer. For a first pop-up greenhouse, that is the best balance of size, speed and cost.
2. Eagle Peak 10×10 — roomiest in the lineup
When a pop-up greenhouse stops being a toy and starts being a plot, the Eagle Peak 10×10 is where it happens.
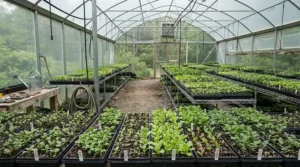
At roughly 3 × 3 m (10 × 10 ft), you get a full square of growing space. That’s room for a central aisle, shelving along two walls and a few tomato containers without bumping elbows. It carries the same centre-lock pop-up mechanism, a steel-ceiling roof, front and rear roll-up zipper doors, and two large roll-up side windows.
What the spec sheet won’t tell you is that bigger means windier. A 3 m square of plastic is a sail. The two doors and large side windows give you a cross-breeze for summer heat, but they also mean you must anchor every corner, and you should open the vents before a storm rather than after.
Review sentiment for the platform is broadly positive on setup speed. As the footprint grows, so do reports of frame stress in gusts. That’s physics, not a flaw.
Pros:
- ✅ Large 3 × 3 m floor for shelving and containers
- ✅ Front and rear doors improve cross-ventilation
- ✅ Same fast centre-lock setup as smaller sizes
Cons:
- ❌ Big surface area catches wind easily
- ❌ Harder to move or store than smaller sizes
Plan on roughly C$280-C$380. It’s good value if you’ll fill the space. Otherwise the Eagle Peak 8×6 is the smarter buy.
3. Yardsight 8.5×7 — best ventilation for sunny sites
The Yardsight 8.5×7 is flagged in roundups for having the most ventilated design among the pop-ups reviewed, and ventilation is the thing most people underestimate.
At about 2.6 × 2.1 m (8.5 × 7 ft), it’s a touch more generous than the 8×6 class, with extra height from the 7 ft dimension. Taller means more air volume, and more air volume means slower temperature swings. In a small tent-style greenhouse, that buffer is valuable.
Here’s the analysis. Cold-tolerant crops such as pansies and lettuce start to stress once the interior climbs past roughly 20°C, while warm-season plants tolerate closer to 27°C before problems begin. A pop-up greenhouse in direct sun can blow past both numbers in an hour. More openings let you dump heat quickly, and the Yardsight 8.5×7 is built around that.
Verifiable review detail is thinner for this model than for the Eagle Peak line, so treat it as a promising, less-proven pick. I’d read current buyer feedback on cover durability before ordering.
Pros:
- ✅ Ventilation-focused design reduces overheating
- ✅ Extra height gives a bigger heat buffer
- ✅ Walk-in size without a huge footprint
Cons:
- ❌ Fewer long-term buyer reports to lean on
- ❌ More openings means more vents to manage
Expect roughly C$200-C$300. It’s a strong match for south-facing yards where overheating is the bigger threat than frost.
4. Eagle Peak 6×4 — budget walk-in for balconies
The Eagle Peak 6×4 shrinks the platform to a size that fits a patio, a balcony corner or a narrow side yard.
Floor space is about 1.8 × 1.2 m (6 × 4 ft). Even so, you can step inside, which beats a cloche you have to unzip and crawl around. It has mesh-reinforced fabric walls, a zippered door, a roll-up window on each side, and a three-part adjustable leg system that adds headroom. The steel-ceiling roof keeps the shape rigid.
In practice, this size is a seedling and hardening-off station. Think of it as a staging room: start trays indoors, harden them off here, then transplant. The small volume heats quickly, so check it daily in spring sun.
Reviewers of the range tend to praise ease of setup and value. The main complaint theme across small pop-ups generally is lightweight frames shifting in wind, so stake it down.
Pros:
- ✅ Compact footprint suits balconies and patios
- ✅ Adjustable legs add useful headroom
- ✅ Lowest entry cost among walk-in models
Cons:
- ❌ Too small for tomato or pepper plants
- ❌ Heats and cools quickly, so it needs attention
Plan on roughly C$130-C$190. As an entry point to a tent-style greenhouse, it’s hard to beat.
5. Outsunny 12x10x7 — big space on a modest budget
The Outsunny 12x10x7 trades finesse for floor area, giving you roughly 3.7 × 3 m (12 × 10 ft) and a 2.1 m ceiling.
It sits closer to a collapsible tent-style greenhouse than a one-push pop-up. The design leaves part of the structure open, so some buyers add fencing or other barriers, and it needs stronger stakes and tie-downs than the box provides. A short review summary calls it good value for casual gardeners willing to reinforce it, and not a hassle-free or heavy-duty option.
That honesty is useful. The Outsunny 12x10x7 makes sense if square metres per dollar is your priority and you don’t mind an afternoon of reinforcing. It doesn’t make sense if you want to open a box and be done.
Other roundups that cover Outsunny’s collapsible walk-in style echo the stake advice: buy sturdier tent posts for the guy ropes.
Pros:
- ✅ Largest floor area for the money
- ✅ Walk-in height suits taller plants
- ✅ Folds away for storage between seasons
Cons:
- ❌ Needs added stakes and anchoring
- ❌ Not a true quick assembly pop-up
Budget roughly C$220-C$350, and verify the current listing. It’s a value pick for patient, practical gardeners.
6. Ohuhu 48x48x64 — compact slot-together seedling shelf house
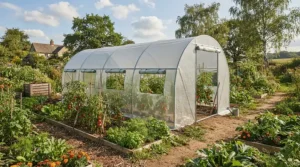
The Ohuhu 48x48x64 is a different animal: a small, upright cabinet greenhouse of about 122 × 122 × 163 cm that you step up to, not into.
Ohuhu’s frames are built from slot-together pieces, which is less instant than a centre-lock pop-up but gives a rigid, shelf-ready skeleton. One UK review site singled out Ohuhu’s mini pop-up for stability, a rare compliment in this category.
The real-world meaning is simple. Vertical space beats floor space when you’re growing herbs, seedlings and lettuce in trays. Shelves let you stack, and the small volume is easy to anchor against a wall or fence.
Treat it as a seed-starting and herb station, not a tomato house. Reviewers of mini cabinet greenhouses often mention covers that need replacement after a season or two, so budget for that.
Pros:
- ✅ Vertical shelving maximizes small spaces
- ✅ Rigid slot-together frame is stable
- ✅ Easy to anchor against a fence
Cons:
- ❌ Cannot walk inside for larger plants
- ❌ Cover may need replacing after a season or two
Expect roughly C$80-C$140. It’s excellent value for seed-starting.
7. AHOME Mini — instant frost cover for a single plant
The AHOME Mini is the smallest and simplest option: a spring-frame dome that pops open and covers one pot or a small patch.
It uses ground tacks, four of them, to hold it down, and roundups call it a perfect pop-up for protecting a small plant from a quick frost. That matches how it behaves in practice. You aren’t growing in it so much as tucking a plant under a blanket for the night.
The honest comparison is with a bedsheet. A mini pop-up beats a sheet because it holds the plastic off the foliage, lets light in by day, and sheds rain. It does not beat a proper tent-style greenhouse for sustained growing.
I’d buy one as a backup, not a plan. Keep it on hand for the night the forecast surprises you.
Pros:
- ✅ Truly instant setup in seconds
- ✅ Cheap enough to keep as a spare
- ✅ Lets light in while blocking frost
Cons:
- ❌ Only covers one plant or small pot
- ❌ Too light for windy locations
Budget roughly C$40-C$80. It’s the cheapest insurance in this list.
Pop-Up Greenhouse Review: What Buyers Actually Report
A good pop-up greenhouse review separates what’s verifiable from what’s marketing. Across independent roundups and retailer listings, a few patterns repeat.
Setup speed is the consistent win. The centre-lock design on the Eagle Peak 8×6, Eagle Peak 10×10 and Eagle Peak 6×4 earns steady praise for one-person opening. Large tunnel-style models draw more mixed feedback. One roundup noted that roughly one in eight reviews of a popular large tunnel greenhouse was one-star, mostly citing cover tearing after storms and frame wobble in wind.
Wind is the consistent weakness. Reviewers across brands say the same thing: unanchored lightweight frames move. This isn’t a defect so much as a design trade-off.
Longevity is the open question. Polyethylene covers degrade under UV. Most buyers treat a pop-up as a three-season structure, not a decade-long one.
| Product | Review Theme | Price Range (CAD, approx.) | Best For |
|---|---|---|---|
| Eagle Peak 8×6 | Fast setup; anchor in wind | C$200-C$280 | Most backyards |
| Eagle Peak 10×10 | Roomy; windy sites need care | C$280-C$380 | Large plots |
| Yardsight 8.5×7 | Ventilation-focused; limited reviews | C$200-C$300 | Sunny yards |
| Eagle Peak 6×4 | Value; small size | C$130-C$190 | Balconies |
| Outsunny 12x10x7 | Value; needs reinforcing | C$220-C$350 | Big space, small budget |
| Ohuhu 48x48x64 | Stable; shelf-style | C$80-C$140 | Seedlings |
| AHOME Mini | Instant; single plant | C$40-C$80 | Frost emergencies |
Read down the “Best For” column and a pattern emerges. The mid-priced Eagle Peak 8×6 wins on convenience, while the Outsunny 12x10x7 wins on space per dollar. If you can only buy one, buy for your biggest actual need, not your biggest hope. A greenhouse you can’t fully use is just expensive wind sail.
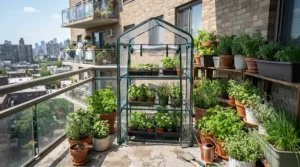
How to Choose a Pop-Up Greenhouse
Choosing well comes down to seven decisions, in this order:
- Measure your site first. Mark out the footprint with string or stakes, then add 60 cm around it for anchoring and airflow.
- Decide what you’re growing. Seedlings need shelves and a small volume. Tomatoes need height and floor space.
- Check the frame material. Steel frames resist bending better than thin tubing, which matters when gusts hit.
- Count the openings. More mesh windows and doors mean easier heat control. Overheating kills more plants than frost does.
- Look at the cover. Clear polyethylene admits the fullest light spectrum, while tinted or reinforced covers trade some light for durability.
- Plan your anchors. Ground stakes, sandbags or bolts should be in your budget before you buy.
- Think about storage. If you’ll fold it away each winter, a bulky frame is a bad bet.
Dalhousie University’s season-extension guide makes a related point: extending the season is about balancing ventilation against frost protection, and your choice depends on how much time and money you want to invest. That framing applies perfectly here.
Buy Pop-Up Greenhouse Tent: Where and How to Shop Smart
If you’re ready to buy pop-up greenhouse tent models, a few shopping habits save money and regret.
Read the dimensions in metric first. Many listings are in feet or inches. Convert before you compare, or a “large” tent may turn out to be a hallway.
Check which size you’re actually viewing. Variants (6×4, 8×6, 10×10) often share one listing page with different options. Confirm the model, size and colour before adding to cart.
Watch the cover colour. Clear covers pass more light. Green or tinted versions cut some brightness, which can help in hot weather but may slow seedlings in early spring.
Treat “free shipping” and “deal” claims with care. Prices on large online retailers change often. Don’t assume any link, including ours, gets a lower price. Check the current price at checkout.
Compare return policies. A frame that arrives bent or a cover with a tear is a return, not a repair project.
If you’re torn between sizes, go one size smaller than your dream and anchor it better. A well-anchored 8×6 outlasts a poorly anchored 10×10 every time.
✨ Don’t Miss These Exclusive Deals!
🔍 Take your growing season to the next level with these carefully selected pop-up greenhouses. Click on any highlighted product to check current pricing and availability. These shelters will help you grow fresh tomatoes, herbs and greens your family will love!
Tent-Style Greenhouse vs Permanent Greenhouse
A tent-style greenhouse and a permanent structure solve overlapping problems at wildly different scales, so the honest question is which problem you actually have.
A permanent greenhouse, whether glass, polycarbonate or cedar-framed, holds heat better, survives snow loads and lasts decades. It also costs far more, needs a foundation, and may trigger a building permit. A tent-style greenhouse costs a fraction, goes up in minutes, and folds away for winter, but its thin cover has almost no insulation.
| Factor | Tent-Style Pop-Up | Permanent Greenhouse |
|---|---|---|
| Typical cost (CAD) | C$40-C$380 | Often several times higher |
| Setup time | Minutes | Days to weeks |
| Winter use | Limited | Possible with heat |
| Lifespan | Roughly 2-5 seasons | Decades |
| Best For | Renters, season extension | Year-round growers |
The table shows a clear split. A pop-up greenhouse is a season extender, while a permanent greenhouse is a growing room. If you’re renting, testing a hobby, or only need six extra weeks of tomatoes, the pop-up wins on cost and flexibility. If you dream of January lettuce, plan for something sturdier and probably heated.
Portable Garden Structures: Where Pop-Ups Fit
Portable garden structures sit on a spectrum, and a pop-up greenhouse occupies the middle of it.
At the light end, you have row covers and cloches that drape over plants. They’re cheap and fast, but they offer no walk-in space. At the heavy end, you have hoop houses and cold frames, which are sturdier and more insulated but harder to move. A cold frame, in the simplest form, is a bottomless box with a glass lid that captures solar warmth and shields plants from wind and rain.
A pop-up sits between them. It gives you standing room that a cold frame can’t, and quicker deployment than a hoop house. For people comparing portable garden structures, the trade-off is stability. The lighter the structure, the more you depend on anchoring and attention.
A useful rule: match the structure to the time horizon. For one frosty night, use a cloche or the AHOME Mini. For six weeks of spring seedling work, use the Eagle Peak 6×4 or Ohuhu 48x48x64. For a full season of tomatoes, use the Eagle Peak 8×6 or larger.
Quick Assembly: A Practical Setup Guide for Your First 30 Days
Quick assembly is the headline promise of every pop-up greenhouse, but “quick” is only half the job. The other half is making it stay put.
Day one: choose and prepare the spot. Pick level ground with at least six hours of sun, shelter from the prevailing wind, and nothing overhead. Clear stones and sticks so they don’t puncture the cover.
Open the frame on flat ground. With centre-lock models, expand the frame by pushing the centre apex up, then lock it before attaching the cover. Don’t force a stuck joint.
Fit the cover and secure every anchor point. Stake the corners at an angle, away from the structure, so pull strength works with the soil. Use all the loops provided, not just the corners.
Add ballast. Sandbags or heavy pots inside the frame lower the centre of gravity. Anchoring should be done the first time, not after the first gust.
First 30 days: watch the temperature. Check the interior on sunny days. Open vents before it gets hot, close them before dusk. A cheap min-max thermometer teaches you more than any manual.
Common first-month mistakes: forgetting to vent, over-watering in cold conditions, and leaving doors unzipped in wind.
Anchoring, Wind and Bylaws: A Problem → Solution Guide
Most pop-up greenhouse failures are really anchoring failures. Here are the common problems and fixes.
Problem: the frame lifts or slides. Solution: use longer ground stakes, drive them at 45 degrees, and add sandbags on the base rails. Lawn is easier than gravel. On patios, use weights or bolt-down brackets where permitted.
Problem: the cover flaps and tears. Solution: keep the cover taut, and clip or tape loose edges. A flapping cover fatigues at the seams.
Problem: sudden storms. Solution: when gales are forecast, zip every door, open a small vent on the leeward side to relieve pressure, and consider dismantling the structure entirely. Folding down is a feature.
Problem: heavy snow. Solution: pop-up greenhouses are not built for snow loads. Brush snow off lightly during the season, and fold the structure away for deep winter.
Problem: bylaws. Solution: rules on temporary garden structures vary by municipality, and large or long-standing structures may be treated differently from small seasonal ones. Check with your city or town before installing something like a 3 × 3 m greenhouse, especially near property lines.
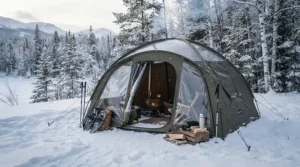
What to Expect: Real-World Performance Across Canada
A pop-up greenhouse is only as good as your local calendar. Commonly cited average frost dates give a rough picture:
- Vancouver: last frost late March, first frost early November, around 220 frost-free days.
- Toronto: last frost around early May, first frost around early October, roughly 150 days.
- Calgary: last frost around late May, first frost mid-September, about 115 days.
- Winnipeg: last frost late May, first frost around the third week of September, about 120 days.
- St. John’s: last frost early June, first frost mid-October, around 130 days.
Treat these as starting points, and look up your own location. In practice, a thin-cover pop-up typically buys you a few degrees of protection, not a different climate. That’s enough to shield tomatoes from a light frost or let you start hardy greens weeks early. It is not enough for a deep freeze.
So in Calgary, you might start seedlings in early May rather than late, and cover tender plants well into September. In Vancouver, you can stretch toward winter greens. In every case, the real skill is ventilation: a closed greenhouse on a sunny day can overheat faster than the weather outside suggests.
Features That Actually Matter (And Those That Don’t)
Marketing copy loves buzzwords. Here is what’s worth paying attention to.
Matters: ventilation. A university farm’s greenhouse manager explains that air circulation supplies carbon dioxide, limits humidity, reduces disease spread and prepares seedlings for outdoor conditions. In a small tent, mesh windows do that job.
Matters: frame rigidity. A steel frame resists bending where thin tubing buckles. That is why steel-ceiling designs like the Eagle Peak 8×6 are favoured over flimsier mini frames.
Matters: anchor points. More loops, more places to tie down.
Matters a little: cover tint. Clear maximizes light, while tinted helps in heat.
Doesn’t matter much: shelf count. Shelves are easy to add separately.
Doesn’t matter much: “UV-resistant” labels without detail. Every cover degrades eventually, and the label rarely tells you how fast.
Doesn’t matter: fancy colours. Function beats fashion.
Common Mistakes When Buying a Pop-Up Greenhouse
A few predictable errors account for most disappointment.
Buying for the dream, not the yard. A 10×10 sounds great until you realise it blocks the path and catches every gust. Measure first.
Ignoring wind exposure. Open prairies and coastal sites punish lightweight structures. Choose a smaller size and anchor aggressively.
Skipping ventilation planning. Many first-timers lose plants to heat, not cold. Watch the thermometer.
Expecting winter performance. A thin polyethylene cover is not an insulated building. For deep winter, think cold frames or a heated permanent structure.
Assuming quick assembly means no maintenance. Covers need cleaning, seams need checking and frames need drying before storage.
Chasing the lowest price blindly. The cheapest listing often has the thinnest cover. A moderately priced option like the Eagle Peak 8×6 or Outsunny 12x10x7 may cost less per season than a bargain that tears in month two.
Long-Term Cost and Maintenance
The real cost of a pop-up greenhouse is price divided by seasons, plus the stuff you buy to keep it alive.
Suppose a C$250 greenhouse lasts three seasons. That’s roughly C$80 per season, before stakes and sandbags. A C$60 mini that lasts one season costs the same per year with far less growing space. In total cost of ownership, the mid-range models often win.
| Cost Factor | Typical Range (CAD) | Notes |
|---|---|---|
| Purchase price | C$40-C$380 | Depends on size |
| Anchors and ballast | C$15-C$50 | Stakes, sandbags |
| Replacement cover | Varies | Often needed after 2-3 seasons |
| Thermometer | C$10-C$25 | Worth it |
The table makes the point that anchors and a thermometer are tiny line items next to the value they protect. A few dollars in stakes can save the whole structure.
Maintenance is easy. Wipe the cover clean, dry the frame before folding, and store it away from rodents. For deeper reading, the Organic Agriculture Centre of Canada collects season-extension resources, from greenhouse production to pest management, and it’s a good next stop if you outgrow the basics.
Real-World Scenarios: Which Pop-Up Greenhouse Fits You?
Three profiles show how the decision plays out.
The condo balconier. You have a south-facing balcony, limited storage and a small budget. A Eagle Peak 6×4 or an Ohuhu 48x48x64 fits the space, and you can fold it away over winter. The shelving of the Ohuhu suits herbs and seedlings, while the walk-in Eagle Peak suits slightly bigger projects. Your biggest risk is balcony wind, so check building rules and anchor carefully.
The suburban tomato grower. You have a 15 × 8 m backyard, a vegetable bed, and a goal of ripening tomatoes into October. The Eagle Peak 8×6 is the right size, with a decent budget and a quick setup. Add sandbags and a thermometer, and vent daily.
The market-garden hobbyist. You’re growing for friends, a farm stand or a community garden, and space is the constraint. The Eagle Peak 10×10 or the Outsunny 12x10x7 gives you room for racks. Plan on stronger anchoring and weekly cover checks, and budget for a replacement cover down the road.
For each profile, the lesson is the same: pick the smallest structure that meets your goal, then spend the savings on anchoring and ventilation.
Safety and Practical Compliance Guide
A pop-up greenhouse seems harmless, but a few safety points deserve attention.
Wind safety. A loose greenhouse can become a hazard to neighbours, fences and vehicles. Anchor it, and take it down in severe weather.
Heat and ventilation. Interior temperatures rise fast. Don’t leave pets or children inside a closed tent on a sunny day.
Heaters. Avoid open-flame or fuel-burning heaters in a plastic tent. If you add heat, use equipment rated for the purpose and keep it well clear of the cover. When in doubt, don’t.
Electrical. Use outdoor-rated, ground-fault-protected circuits for any lights or fans, and keep cords off wet ground.
Local rules. As noted, municipal bylaws on accessory structures vary. Check before you install a large one.
Pesticides and ventilation. If you spray anything, ventilate thoroughly before entering.
FAQ
❓ Can a pop-up greenhouse stay up all winter in Canada?
❓ How much wind can a pop-up greenhouse handle?
❓ Do I need a permit for a pop-up greenhouse?
❓ Is a pop-up greenhouse worth it for starting seeds?
❓ Where can I buy a pop-up greenhouse tent in Canada?
Conclusion
A pop-up greenhouse is the rare garden purchase that is cheap, fast and genuinely useful, but only if you buy it for what it is. It is a season extender, not a winter fortress. Its strengths are speed, flexibility and affordability, and its weaknesses are wind and insulation.
For most Canadian gardeners, the Eagle Peak 8×6 is the best starting point, offering walk-in space, quick assembly and strong overall sentiment among roundups. If space is your priority, the Eagle Peak 10×10 and Outsunny 12x10x7 deliver, provided you anchor them properly. For ventilation-heavy sites, look at the Yardsight 8.5×7. For balconies and seed shelves, the Eagle Peak 6×4 and Ohuhu 48x48x64 make sense, and the AHOME Mini belongs in every gardener’s emergency kit.
Whatever you choose, measure first, anchor firmly, vent daily and check current pricing before buying. Do that, and the frost that ends other people’s gardens becomes the day you tuck yours in for the night.
✨ Ready to stretch your season?
🌱 Compare the options above, click through to check current pricing and availability, and give your garden a head start! 🍅
Recommended for You
- Polycarbonate Greenhouse For Cold Winters: 7 Best Kits 2026
- Polycarbonate Greenhouse Kit: 7 Best Buys, No Regrets 2026
- 10×12 Greenhouse For Serious Gardeners: 7 Proven Picks 2026
Disclaimer: This article contains affiliate links. As an Amazon Associate, I earn from qualifying purchases. If you purchase products through these links, we may earn a small commission at no additional cost to you.
✨ Found this helpful? Share it with your friends! 💬🤗
