
In This Article
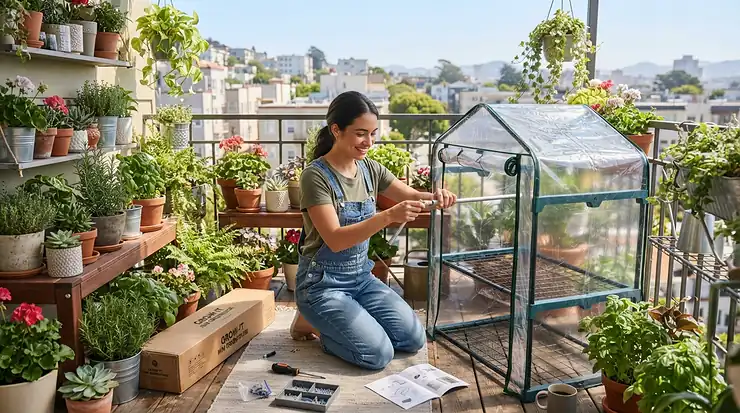
It’s October 20, and your tomato plants have clearly stopped believing in summer. The nights are dipping toward frost, the basil is sulking, and your balcony, which was a jungle in July, now looks like a yard sale for the plant world. This is exactly the moment a pop-up greenhouse for balcony gardening earns its keep.
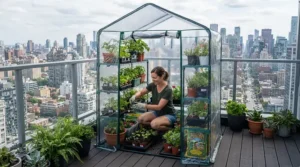
The idea is simple. A light frame, a clear cover and a zippered door give you a micro-climate that can stretch your season by weeks on each end. Better still, it folds down flat when you’re done. Compared with a glass-and-aluminum greenhouse, there’s no foundation, no permit headaches and no weekend lost to tiny bolts.
Here’s the catch, and it’s a big one for Canadians. A balcony is not a backyard. Wind whips around highrises, the floor space might be 1.5 m wide, and your condo board may have opinions. So the “best” greenhouse isn’t the biggest or the cheapest. It’s the one that survives your wind, fits your footprint and tucks away when you need the room back.
I researched seven real models across budget, mid-range and premium tiers. I compared their specs, read the patterns in published reviews, and translated the spec sheets into what they mean on an actual balcony. Along the way you’ll also find advice on pop-up greenhouse for small yards, seed starting, storage, and the container plants that pair best with each size. Prices below are ranges in Canadian dollars at the time of research, so check current prices before you buy.
Quick Comparison Table: 7 Pop-Up Greenhouses at a Glance
Here’s the cheat sheet. Dimensions are converted to metric, and price ranges are approximate CAD figures that move with exchange rates and promotions.
| Product | Type | Approx. Size | Best For | Price Range (CAD) |
|---|---|---|---|---|
| Ahome Mini Pop-Up Greenhouse | Frost-cover tent | Compact tent | Ahome: single plants, frost snaps | Under C$60 |
| Ohuhu 4-Tier Mini Greenhouse | Shelf rack + cover | 69 × 48 × 157 cm | Ohuhu 4-Tier: seed starting on narrow balconies | C$40-C$80 |
| Pure Garden 4-Tier Mini Greenhouse | Rolling shelf rack | Similar rack footprint | Pure Garden: movable seedlings | C$40-C$90 |
| Ohuhu Walk-In Greenhouse | Walk-in shelf unit | Walk-in with shelves | Ohuhu Walk-In: herb and veg collections | C$100-C$180 |
| Eagle Peak 6×4 Easy Setup | True pop-up, walk-in | 1.8 × 1.2 m | Eagle Peak 6×4: wide balconies, small patios | C$160-C$230 |
| Eagle Peak 8×6 Pop-Up | True pop-up, walk-in | 2.5 × 1.8 m | Eagle Peak 8×6: small yards | C$170-C$260 |
| Eagle Peak 10×10 Pop-Up | True pop-up, walk-in | 3 × 3 m | Eagle Peak 10×10: roomy yards, shared decks | C$270-C$390 |
Looking at the table, the four shelf and tent models all sit under roughly C$180, which makes them the sensible entry point if you’re testing whether greenhouse life suits you. The three Eagle Peak models cost more because you’re paying for a real steel-ceiling frame and a patented centre-lock that lets one person open it in seconds. If your balcony is narrower than about 1.5 m, skip the walk-in sizes entirely and go vertical with a tiered rack.
💬 Just one click — help others make better buying decisions too!😊
Top 7 Pop-Up Greenhouses for Balcony Gardening: Expert Analysis
I’ve ordered these from budget to premium. A caveat first: published reviews of these models mostly come from third-party roundups and retail listings, and I couldn’t verify a full review breakdown for each amazon.ca listing. Where I describe reviewer sentiment, it reflects patterns in those published sources, so always skim the current ratings before you buy.
1. Ahome Mini Pop-Up Greenhouse — instant frost cover for one plant
The Ahome Mini Pop-Up Greenhouse is the plant equivalent of a winter coat you throw over a shivering friend. It opens in seconds and covers a single large pot or a small cluster.
The spec that matters is the ground-tack anchoring. One published roundup notes it ships with four tacks to hold it in place. On a balcony you can’t push tacks into concrete, so plan to weigh the base with bricks or pavers instead. In practice, that makes it a frost shield for tender container plants like a lemon tree or a rosemary pot, rather than a growing space.
Based on the specs, this suits renters who want to protect two or three prized pots through the first cold snaps of October. It’s less suited to seed trays, because the tent form leaves little room for shelving. Reviewers of mini pop-ups generally praise the speed of setup. The usual complaint is that lightweight covers can lift in gusts if they aren’t ballasted.
Pros:
- ✅ Opens in seconds, no tools needed
- ✅ Folds small for compact storage
- ✅ Low cost for frost protection
Cons:
- ❌ No shelving for trays
- ❌ Needs ballast on hard surfaces
Expect to pay under C$60, which is very good value as a seasonal frost cover.
2. Ohuhu 4-Tier Mini Greenhouse — best vertical use of a narrow balcony
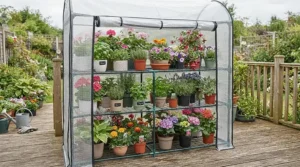
If your balcony is a hallway with a view, the Ohuhu 4-Tier Mini Greenhouse is your answer. At about 69 × 48 × 157 cm, it takes the footprint of a bar stool and stacks four shelves above it.
Each shelf is rated for roughly 10 kg, which handles standard seed flats and a few small pots. A PE cover with a zippered roll-up door keeps humidity in and wind off. Think of it as a heated closet for seedlings, minus the heater.
My analysis: this is the strongest match for a narrow balcony, because it gives you four layers of growing space in the footprint of one pot. One roundup cites more than 2,800 reviews averaging 4.4 stars, which is a healthy sample, though it’s from a US listing. Common themes in reviews of this style of rack include easy assembly and a cover that can flap in wind unless you secure it.
Pros:
- ✅ Four shelves in a tiny footprint
- ✅ Roll-up door for ventilation
- ✅ Ideal size for seed trays
Cons:
- ❌ Cover can flap in strong wind
- ❌ Too short for tall tomatoes
Budget roughly C$40-C$80. It’s a very strong value for seed starting.
3. Pure Garden 4-Tier Mini Greenhouse — locking wheels for chasing the sun
The Pure Garden 4-Tier Mini Greenhouse looks similar to the Ohuhu on paper, but its trick is locking wheels. For a balcony that swings from bright morning sun to afternoon shade, that mobility is a quiet superpower.
Shelves are rated for about 11 kg each, plenty for flats and herb pots. A PVC cover with a zippered door seals the front. Several 2026 roundups list it as a top mini pick for seed starting on patios and garages.
Wheels matter more than they sound. You can roll the unit toward the glass door on frosty nights, tucking it against warm brick, then roll it back out for daytime sun. Reviewers in these roundups tend to like the stability once the cover is tight, and tend to flag the plastic fittings as the first thing to wear.
Pros:
- ✅ Locking wheels for sun tracking
- ✅ Sturdy shelves for trays
- ✅ Easy to stow when empty
Cons:
- ❌ Plastic fittings can age quickly
- ❌ Not tall enough for fruiting plants
Expect roughly C$40-C$90. The wheels alone justify the premium over a fixed rack.
4. Ohuhu Walk-In Greenhouse — shelf-packed walk-in for herb and veg collections
The Ohuhu Walk-In Greenhouse is where you step up from “shelf with a cover” to “I can actually stand inside this.” It’s built around a tubular frame with multi-tier shelving and mesh windows for airflow.
The mesh windows matter in an unexpected way. Without them, a walk-in becomes a sauna by 11 a.m. on a sunny day in March, because plastic traps heat quickly. A published roundup rates it a best-value walk-in. It also warns that plastic connectors may pop off in strong gusts, though once anchored the frame felt solid to that reviewer.
Honestly, this works best on a wide balcony, a rooftop terrace or a small patio. Anchoring is non-negotiable, so budget for sandbags or tie-downs. If your balcony is windy and high, treat this as a ground-level or low-floor option.
Pros:
- ✅ Walk-in space with built-in shelving
- ✅ Mesh windows prevent overheating
- ✅ Strong value per growing shelf
Cons:
- ❌ Connectors may pop in strong gusts
- ❌ Too large for narrow balconies
Plan on roughly C$100-C$180. It’s good value if you have the floor area.
5. Eagle Peak 6×4 Easy Setup Pop-Up Greenhouse — true pop-up on a balcony-friendly footprint
The Eagle Peak 6×4 Easy Setup Pop-Up Greenhouse (about 1.8 × 1.2 m) is the first model here that genuinely earns the “pop-up” label. The brand’s patented Peak Push system opens and closes the frame from the centre, so one person can set it up without tools.
It has mesh-reinforced fabric walls, a zippered door, roll-up windows on both sides and a steel-ceiling roof. Three-part adjustable legs give you extra headroom, which is a thoughtful detail for anyone taller than a garden gnome. That frame is meaningfully sturdier than tent-style minis.
The tradeoff is real estate. A 1.2 m depth fits many condo balconies, but a 1.8 m length is a lot of rail. On a balcony wide enough to host it, though, this is arguably the sweet spot between capacity and convenience. Reviewers of Eagle Peak’s line commonly praise the quick setup and call out anchoring as essential.
Pros:
- ✅ One-person, tool-free setup
- ✅ Steel-ceiling frame feels rigid
- ✅ Roll-up windows for airflow
Cons:
- ❌ Needs real anchoring on balconies
- ❌ Takes over a good chunk of floor
Expect roughly C$160-C$230. Strong value for a walk-in that folds away.

6. Eagle Peak 8×6 Pop-Up Greenhouse — best pop-up greenhouse for small yards
The Eagle Peak 8×6 Pop-Up Greenhouse (about 250 × 180 × 233 cm) turned up as a top pick across multiple 2026 roundups, including some focused on greenhouses for small yards. It’s too large for most balconies but nearly perfect for a patio, deck or compact yard.
Roll-up mesh doors on the front and back create cross-ventilation, which is how you avoid cooking your lettuce. That airflow is the difference between a greenhouse and a very expensive terrarium. Add a couple of wire shelves and you’ve got room for seed trays, herbs and a few tomato transplants.
If you’re shopping for pop-up greenhouse for small yards specifically, this is where I’d start. It’s tall enough to move around in without the claustrophobia of a smaller tent. Reviewers tend to like how quickly it goes up, while the common caution is that a stake-only anchor isn’t enough on soft soil.
Pros:
- ✅ Roomy enough for staging shelves
- ✅ Roll-up mesh doors ventilate well
- ✅ Frame opens from the centre quickly
Cons:
- ❌ Too big for most balconies
- ❌ Needs heavy anchoring in wind
Budget roughly C$170-C$260. Good value for the footprint you get.
7. Eagle Peak 10×10 Pop-Up Greenhouse — premium space for shared decks and yards
The Eagle Peak 10×10 Pop-Up Greenhouse (about 3 × 3 m) is the biggest on the list, with front and rear roll-up zipper doors and two large roll-up side windows. It uses the same steel-ceiling, centre-lock design as its smaller siblings.
I’d only recommend it if you have a proper yard, a large rooftop terrace or a shared deck. Nine square metres of plastic is a sail, and condo balconies are not the place for sails. In a yard, though, it works as a genuine potting shed, with room for benches, trays and a few big containers.
Reviewers of large pop-ups tend to highlight how much usable space you get for the price compared with a permanent greenhouse. The flip side is storage: even folded, a 3 m frame is long and awkward, so check your garage or locker before ordering.
Pros:
- ✅ Huge growing and working space
- ✅ Doors at both ends for airflow
- ✅ Same fast centre-lock setup
Cons:
- ❌ Far too large for balconies
- ❌ Folded frame is long to store
Expect roughly C$270-C$390. It’s good value only if you’ll use the space.
Value at a Glance: What Each Dollar Buys
| Product | Price Range (CAD) | Value Logic | Verdict |
|---|---|---|---|
| Ahome Mini Pop-Up Greenhouse | Under C$60 | Frost cover for a few pots | Cheap insurance |
| Ohuhu 4-Tier Mini Greenhouse | C$40-C$80 | Four shelves, tiny footprint | Best seed-starting value |
| Pure Garden 4-Tier Mini Greenhouse | C$40-C$90 | Rolling shelves | Best for shifting sun |
| Ohuhu Walk-In Greenhouse | C$100-C$180 | Standing room plus shelves | Best budget walk-in |
| Eagle Peak 6×4 Easy Setup | C$160-C$230 | Fast frame, balcony-ish size | Best balance |
| Eagle Peak 8×6 Pop-Up | C$170-C$260 | Space for a small yard | Best for yards |
| Eagle Peak 10×10 Pop-Up | C$270-C$390 | Potting-shed volume | Only if space allows |
The cost-per-season math favours the mid-range. Spread over three or four seasons of use, even the pricier Eagle Peak models work out to a modest cost per growing month. The cheapest options win only if they survive your wind, so factor in a replacement cover or two over a few years.
What Is a Pop-Up Greenhouse for Balcony Gardening?
A pop-up greenhouse for balcony gardening is a lightweight, collapsible frame wrapped in clear plastic that traps warmth and blocks wind around your plants. It sets up without tools, fits small outdoor spaces like balconies and patios, and folds flat for compact storage when the growing season ends.
That definition covers a wide spread. At one end are shelf-style racks with zip-up covers. At the other are walk-in pop-ups with steel-ceiling frames. What they share is the physics of any greenhouse: sunlight passes through the glazing, warms the surfaces inside, and the enclosure keeps that heat from escaping.
Why does this suit urban gardening so well? Because cities create strange micro-climates. A balcony can run several degrees warmer than the street, but it can also be a wind tunnel. A pop-up gives you control over both. You can vent it on warm days, close it on cold nights, and take it down in July when you’d rather have a hammock.
One honest limit: plastic covers insulate far less than glass. You’re extending the season by a few weeks, not growing bananas in January. That’s still a big win for lettuce, herbs, seedlings and overwintering tender container plants.
How to Choose a Pop-Up Greenhouse for Balcony Gardening
Follow these steps in order. Each one cuts the field down.
- Measure your balcony first. Subtract about 15 cm from the footprint for clearance, and note railing height. Narrow balconies suit vertical racks like the Ohuhu 4-Tier Mini Greenhouse, while wider ones can host the Eagle Peak 6×4 Easy Setup Pop-Up Greenhouse.
- Assess your wind exposure. Highrise balconies above about the sixth floor can see serious gusts. Choose a low, compact shape and plan anchoring before you buy.
- Decide what you’re growing. Seed trays need shelving. Tall tomatoes need headroom. Herbs and lettuce are happy in either.
- Check the cover material. PE is lighter and cheaper, while PVC tends to feel heavier and more durable. Heavier covers resist flapping but cost more.
- Look at ventilation. Roll-up doors and mesh windows are not optional. A sealed plastic box overheats on a sunny day.
- Think about storage. If you have a small locker, favour models that fold flat, as covered in the storage section below.
- Set a budget with replacement in mind. Plastic covers eventually yellow or tear, so a model with replaceable covers wins long-term.
Pop-Up Greenhouse for Small Yards: Where the Walk-Ins Shine
Small yards are where walk-in pop-ups truly make sense. You’ve got soil or a patio, no wind-tunnel effect from a tower, and enough room to spread out.
Here’s what to weigh. Ground anchoring is easier in a yard, but soft soil can let stakes slip. One reviewer of a walk-in pop-up reported exactly that after wind and rain loosened the ground. The fix is simple: add sandbags or concrete pavers to the frame legs, or tie the frame to a fence or wall.
Placement is the next lever. Put the greenhouse where it catches at least six hours of direct sun, ideally with a south-facing door that you can crack open. Keep it a metre from fences to leave airflow and access for cleaning.
For this use, the Eagle Peak 8×6 Pop-Up Greenhouse and the Eagle Peak 10×10 Pop-Up Greenhouse are the standouts, with the Ohuhu Walk-In Greenhouse as the budget alternative. A pop-up greenhouse for small yards also doubles as a hardening-off station, where seedlings get used to the outdoors before they hit the garden bed.
✨ Don’t Miss These Exclusive Deals!
🔍 Take your growing season to the next level with these carefully selected greenhouses. Click on any highlighted product to check current pricing and availability. A few minutes of setup could mean weeks of extra harvest for your family!
Pop-Up Greenhouse for Seed Starting: A Practical Guide
Seed starting is where a small greenhouse earns its keep, and where most beginners trip up. Here’s a simple routine.
Step 1: Get your timing right. The classic rule is to start seeds roughly six weeks before your last frost date, but it varies by crop. This Promix guide on timing seeds indoors walks through frost dates, germination speed and hardiness zones. In southern Ontario, for example, one planting calendar suggests starting tomatoes and peppers indoors around late March.
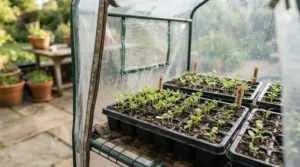
Step 2: Set up the shelves. In a Pure Garden 4-Tier Mini Greenhouse or Ohuhu 4-Tier Mini Greenhouse, put the warmest, brightest shelf to use for germination, and keep taller seedlings on the top shelf for light.
Step 3: Vent daily. Open the roll-up door for 15 to 30 minutes on mild days. Damp, stagnant air invites mould and damping-off.
Step 4: Watch for overheating. A sealed pop-up can climb well past 30°C on a sunny afternoon, even in March. A cheap min-max thermometer is the best C$15 you’ll spend.
Step 5: Harden off. Before transplanting, move seedlings into the greenhouse with the door open for a few days, then outdoors for increasing stretches.
A pop-up greenhouse for seed starting won’t replace grow lights in dark apartments, but on a sunny south-facing balcony it can run the whole show from April on.
Pop-Up Greenhouse for Easy Storage: Making Compact Storage Work
Storage is the quiet deciding factor. A greenhouse that’s miserable to put away tends to live outdoors all year, shredding its cover in the process.
Shelf-and-cover units like the Ohuhu 4-Tier Mini Greenhouse strip down to a flat bundle of poles and plastic, which fits behind a door or under a bed. Tent-style frames like the Ahome Mini Pop-Up Greenhouse collapse even smaller. The Eagle Peak models fold from the centre, but even collapsed they’re long, so measure your locker before you click buy.
For true compact storage, follow this routine at the end of each season:
- Wipe the cover and frame with mild soapy water, then let everything dry fully. Storing it damp invites mildew.
- Remove soil and plant debris, which can harbour pests into next year.
- Label the poles and connectors in a zip bag so reassembly is painless.
- Store it away from sharp objects and out of direct sun, which degrades plastic.
Treat easy storage as a feature you’re buying, not an afterthought. A pop-up greenhouse for easy storage that goes back into its bag cleanly will often outlast a cheaper one that gets abandoned on the balcony to bake and tear.
Container Plants That Thrive Inside a Balcony Greenhouse
Not every plant belongs in a greenhouse, and the right container plants make the whole setup more productive. A University of Toronto sustainability report on container gardening explores how container-based growing can work in dense urban settings, which is a helpful backdrop for your balcony.
For cool-season shoulders, lettuce, spinach, arugula, kale and radishes love the extra warmth and stay productive into late fall. Herbs like parsley, chives, thyme and rosemary overwinter well in a greenhouse that stays above deep freezing. Tender favourites like pepper and tomato seedlings do great in spring, before they head to larger pots.
Container choices matter just as much. Choose pots with drainage holes, because soggy roots are the leading cause of container failures. Fabric grow bags breathe well and weigh little, which suits balcony loads. Group pots in trays so water doesn’t drip onto neighbours below.
One trick: put your biggest, heaviest pots on the bottom shelf or floor for stability, and lighter seedling flats on top. In a wind gust, that low centre of gravity matters more than you’d expect.
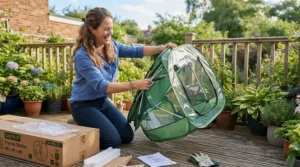
Common Mistakes When Buying a Pop-Up Greenhouse for Balcony Gardening
I’ll be blunt here, because these errors are predictable.
Buying too big. The 3 m model looks heroic online. On a 1.4 m-deep balcony it’s a ship in a bathtub. Always measure with painter’s tape on the floor first.
Ignoring anchoring. Several roundups warn that a light pop-up frame can turn into a projectile in a severe wind event. Plan for sandbags, pavers or tie-downs before the greenhouse arrives, not after the first gust.
Skipping ventilation. A greenhouse without vents is an oven. Make sure whatever you pick has roll-up windows or doors, and then actually use them.
Forgetting building rules. Condo bylaws and rental agreements often restrict what you can put on a balcony. Check yours before spending money, because a removed greenhouse is a wasted purchase.
Chasing the lowest price. The cheapest covers can tear in a season. Paying a bit more for a sturdier frame or replaceable cover usually wins over two or three years.
Overloading shelves. Weight ratings of about 10 to 11 kg per shelf are for evenly spread loads, not a row of wet ceramic pots.
Pop-Up Greenhouse vs Traditional Alternatives
How does a pop-up compare with the other ways to protect plants? Here’s a side-by-side.
| Option | Setup | Storage | Heat Retention | Best For |
|---|---|---|---|---|
| Eagle Peak 6×4 Easy Setup (pop-up) | Minutes, one person | Folds, but long | Moderate | Wide balconies, small yards |
| Ohuhu 4-Tier Mini Greenhouse (rack) | Under an hour | Flat bundle | Moderate | Narrow balconies, seedlings |
| Wooden cold frame | Heavy, semi-permanent | Hard to store | Good | Ground-level beds |
| Glass greenhouse | Days, foundation | Not storable | Excellent | Dedicated yards |
| Window shelf | None | N/A | Minimal | Apartments with sunny sills |
The analysis is straightforward. Glass and wood hold heat better and last longer, but they’re expensive and permanent, which makes them poor matches for renters and balcony growers. The Eagle Peak 6×4 wins on flexibility, while the Ohuhu 4-Tier wins on footprint. One of the reviewed roundups also notes that wooden balcony greenhouses handle wind better than flimsier pop-ups, at a higher price. That’s a fair trade-off if you’re on a windy highrise and plan to stay put.
Real-World Scenarios: Which Greenhouse Fits Which Gardener
Scenario 1: The condo renter with a 1.2 m-deep balcony. Budget C$100, wants herbs and a few tomato seedlings. The Ohuhu 4-Tier Mini Greenhouse or Pure Garden 4-Tier Mini Greenhouse fits perfectly. The wheels on the Pure Garden help if the sun moves across the balcony, and both stow in a closet over winter.
Scenario 2: The townhouse owner with a 2 × 3 m patio. Budget C$250, wants a spring seed-starting hub and fall lettuce. The Eagle Peak 6×4 Easy Setup Pop-Up Greenhouse gives walk-in space without swallowing the patio, and the quick fold-down means it’s out of the way for summer barbecues.
Scenario 3: The family with a small backyard. Budget C$300, wants vegetables, a hardening-off area and room to grow. The Eagle Peak 8×6 Pop-Up Greenhouse is the sweet spot. It’s large enough for shelving and tall transplants, yet still storable in a garage. If they have more room and ambition, the Eagle Peak 10×10 Pop-Up Greenhouse becomes a full potting shed.
Notice what drives each choice: footprint, wind, storage, and what’s actually being grown. Price is the last variable, not the first.
Problem → Solution Guide for Balcony Greenhouse Owners
Problem: wind lifts or flaps the cover. Anchor the frame with sandbags or pavers on every leg, and tie it to the railing with heavy-duty zip ties at several points. Avoid tying to flimsy railings.
Problem: it gets too hot. Open doors and windows early, and consider a shade cloth in late spring. A max-min thermometer shows you the real temperatures.
Problem: condensation and mould. Vent daily, space plants so air moves, and water in the morning so leaves dry by night.
Problem: soggy or leaking pots. Use drainage trays, and check the City of Saskatoon’s small-space gardening brochure, which covers choosing food-safe containers with proper drainage.
Problem: frost still gets in. Pile extra pots tightly together for thermal mass, use frost cloth over delicate plants, and keep plants away from cold plastic walls.
Safety, Rules and Balcony Compliance in Canada
A few practical points before you buy. First, check your condo bylaws or lease. Some buildings restrict structures on balconies, and rules vary by building and municipality.
Second, mind the load. A balcony has a weight limit, and wet soil, ceramic pots and water add up fast. Use lightweight containers and avoid piling everything on one side.
Third, be careful with heat. One reviewer mentions using a small heater inside a pop-up during a freeze, but electric heaters in plastic enclosures carry real fire risk. If you plan electrical heating, use only equipment rated for the purpose, never leave it unattended, and check manufacturer guidance and your building’s rules. Canadian-certified (CSA) electrical products are the baseline to look for.
Finally, think about neighbours below. Water runoff, falling debris and a loose cover in a storm are all someone else’s problem too. Secure everything, and drain responsibly.

Frequently Asked Questions
❓ How much wind can a pop-up greenhouse for balcony gardening handle?
❓ Can I leave a pop-up greenhouse up all winter in Canada?
❓ Do I need a heater for a balcony greenhouse?
❓ What size pop-up greenhouse fits a typical condo balcony?
❓ How do I clean and store a pop-up greenhouse for the off-season?
Conclusion
A pop-up greenhouse for balcony gardening isn’t about pretending you live in a conservatory. It’s about stealing a few extra weeks of green on both ends of the season, without a foundation, a permit or a bruised wallet.
If your balcony is narrow, the Ohuhu 4-Tier Mini Greenhouse or Pure Garden 4-Tier Mini Greenhouse gives you four shelves in a footprint the size of a bar stool. If it’s wider, the Eagle Peak 6×4 Easy Setup Pop-Up Greenhouse is the balance point between capacity and convenience. And if you have a small yard, the Eagle Peak 8×6 Pop-Up Greenhouse gives you real working space. For a cheap frost shield, the Ahome Mini Pop-Up Greenhouse does one job well.
Whatever you choose, anchor it properly, vent it daily and store it clean. Those three habits matter more than any spec on the box. Start now, while the October frosts are still teaching you what your plants need.
Recommended for You
- Pop-Up Greenhouse: 7 Best Picks For Canada In 2026
- Polycarbonate Greenhouse For Cold Winters: 7 Best Kits 2026
- Polycarbonate Greenhouse Kit: 7 Best Buys, No Regrets 2026
Disclaimer: This article contains affiliate links. As an Amazon Associate, I earn from qualifying purchases. If you purchase products through these links, we may earn a small commission at no additional cost to you.
✨ Found this helpful? Share it with your friends! 💬🤗
