
In This Article
Every Canadian gardener knows the heartbreak of one clear, still October night. Yesterday your lettuce was glossy and proud. This morning it’s a limp, glassy puddle. Frost doesn’t negotiate. A cold frame greenhouse for season extension is how you start negotiating back.
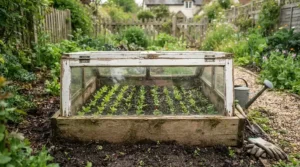
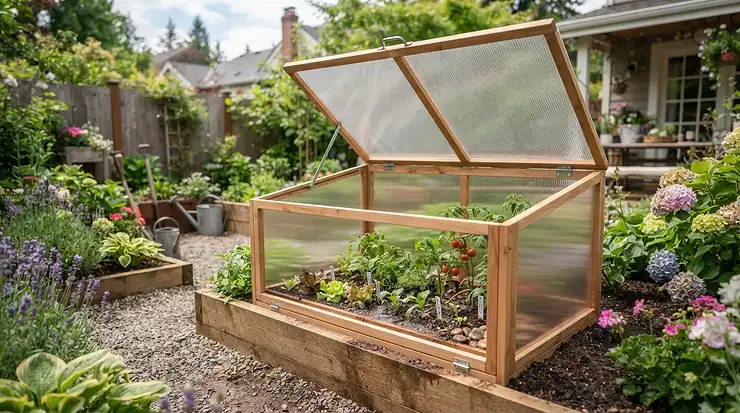
The idea is almost insultingly simple: a low, bottomless box with a transparent lid that soaks up sunshine, blocks the wind and holds a few precious degrees after dark. The Dalhousie Agricultural Campus extension resources treat cold frames as an easy, low-cost way to stretch the season, right alongside floating row covers. Those few degrees add up fast. Depending on your region and crop, a well-placed frame can buy you anywhere from a few weeks to a couple of months, split across both ends of the year.
It’s late October 2026, which makes this a smart moment to shop. Your fall harvest is either tucked in or hanging on by a thread, and next spring’s planting plan is already nagging at you. Buy now, set it up this weekend, and you could be eating homegrown salad greens before the snow has fully melted.
Here’s what you’ll get: seven real cold frame models across budget, mid-range and premium tiers. You’ll also get an honest look at wooden versus polycarbonate builds, a shortlist that stays under $200 CAD, a 10-day plan for hardening off seedlings, and a playbook for spring planting and fall harvest. Every spec gets translated into what it means in your backyard.
One note on method. This guide is built from manufacturer specs, retailer listings and published extension-service guidance, not from hands-on testing. Where something couldn’t be verified, I’ll say so.
Quick Comparison: 7 Cold Frame Greenhouses for Season Extension at a Glance
Here’s the lineup, sorted from cheapest to priciest. Prices are ballpark ranges in Canadian dollars at the time of research, so check current pricing on each listing.
| Product | Build | Approx. Size (cm) | Price Range (CAD) | Best For |
|---|---|---|---|---|
| Gardzen Mini Greenhouse | Steel frame, soft cover | Compact, portable | C$70-C$130 | Renters, balconies, first-timers |
| Zenport SH3212A Cold Frame Cloche | Steel frame, plastic cover | 119 × 61 × 61 | C$100-C$180 | Moving frames between beds |
| Outsunny Wooden Cold Frame Mini Greenhouse | Fir wood, polycarbonate panels | 99 × 66 × 41 | C$130-C$200 | Greens and seed trays on a budget |
| Giantex Wood Cold Frame Greenhouse | Elevated fir wood, vented roof | 91 × 51 × 107 | C$150-C$230 | Gardeners with bad backs |
| Backyard Discovery Aggie | Cedar, auto-vent polycarbonate lid | 122 × 61 | C$250-C$380 | Busy people who forget to vent |
| Palram Canopia Plant Inn | Aluminum, polycarbonate, raised | 116 × 116 | C$330-C$480 | Low-maintenance, long-life setups |
| Juwel Biostar | Premium twin-wall polycarbonate | Varies by model | C$450-C$700 | Buy-once, use-for-decades gardeners |
The Gardzen Mini Greenhouse and Zenport SH3212A are the lightest on your wallet, but their soft covers trade insulation for portability. The Outsunny Wooden Cold Frame is the sweet spot for most beginners, because rigid polycarbonate panels hold heat far better than film. If you want automation and a warranty to match, the Backyard Discovery Aggie and Palram Canopia Plant Inn justify their higher price tags.
💬 Just one click — help others make better buying decisions too!😊
What Is a Cold Frame Greenhouse for Season Extension?
A cold frame greenhouse for season extension is a low, unheated, bottomless box topped with a clear or translucent lid that traps solar warmth and blocks wind. It lets gardeners sow earlier in spring, harden off seedlings, and keep hardy crops growing weeks past the first fall frost, without electricity or a full-size greenhouse.
That’s the textbook version. The practical version: it’s a pocket-sized climate zone. The frame shelters plants from wind chill, the glazing converts sunlight into trapped heat, and the soil underneath stores warmth to release overnight. University of Vermont Extension notes that a frame can let you start some plants two to four weeks before the recommended planting date. Other gardening sources suggest it can add one to three months of total growing time across both seasons.
Two things separate a cold frame from a mini greenhouse. First, there’s no heater, so you’re working with free solar energy only. Second, ventilation matters more than insulation. A frame that can’t open easily on a sunny day will cook your seedlings faster than any frost would kill them.
Top 7 Cold Frame Greenhouses for Season Extension: Expert Analysis
I’ve ranked these from lowest to highest cost, covering budget, mid-range and premium options. Each section translates specs into real-world meaning. Because I haven’t been able to verify full Amazon.ca review text for every model, review sentiment below is labelled by what could and couldn’t be confirmed. Always skim the 2- and 3-star reviews on the live listing before you buy.
1. Gardzen Mini Greenhouse — cheapest way to test the waters
Think of this as the gateway model for cold framing. It’s a lightweight steel frame with a soft cover and a roll-up door, built to be moved, folded away and shoved in a shed.
The soft cover lets plenty of light through, but film insulates far less than rigid polycarbonate. That means it’s best for hardening off seedlings, sheltering potted herbs and rescuing a few lettuce pots during shoulder-season cold snaps, not for riding out a -10°C night. Wind is the real enemy of lightweight frames, so plan on anchoring it with pegs or sandbags.
On paper this suits renters, balcony gardeners and anyone who wants to test whether cold framing fits their routine before spending real money. Third-party roundups list ratings in the mid-4s out of 5, though I couldn’t verify verbatim Amazon.ca review text. Check recent reviews specifically for zipper durability and wind stability.
Pros:
- ✅ Very light and easy to relocate
- ✅ Roll-up door gives quick airflow
- ✅ Lowest entry cost in this guide
Cons:
- ❌ Soft cover holds less heat overnight
- ❌ Needs anchoring in windy spots
Expect to land around C$70-C$130; it’s great value as a trial run, but not a long-term winter solution.
2. Zenport SH3212A Cold Frame Cloche — pop-up portability with real headroom
The Zenport SH3212A measures about 119 × 61 × 61 cm (47 × 24 × 24 inches), with a steel frame, plastic cover and a zippered roll-up front. That 61 cm height is the headline. It’s tall enough for potted tomato and pepper seedlings, which cramped 40 cm frames can’t handle.
The zippered cover is more convenient than lifting a lid every morning, but plastic can overheat quickly on sunny days. One roundup reviewer suggested draping a 30% shade cloth over it during warm spells, which is sensible advice for any soft-cover frame. Because it’s portable, you can park it over a bed in March, then shift it to a fall-crop bed in September.
Roundups rate it just above 4 out of 5, although I couldn’t confirm full Amazon.ca review text. Look for comments on cover durability after a full season of UV exposure.
Pros:
- ✅ Generous 61 cm height for taller seedlings
- ✅ Zippered access, no lid to prop
- ✅ Moves between beds easily
Cons:
- ❌ Plastic cover can overheat on sunny days
- ❌ Less insulation than rigid panels
Budget around C$100-C$180; it’s a flexible, portable frame that makes good sense for gardeners who rotate beds.
3. Outsunny Wooden Cold Frame Mini Greenhouse — best wood-and-polycarbonate starter
This is the model most beginners should look at first. It measures 99 × 66 × 41 cm (39 × 26 × 16 inches), with a fir wood frame, polycarbonate panels and an openable top vent.
The 41 cm height keeps the profile low and wind-resistant, which is exactly right for salad greens, radishes and seed trays. Rigid polycarbonate also insulates noticeably better than film, so you get more overnight protection. The catch is that fir is a softwood, so untreated wood will weather. Sealing it with a food-safe finish, then re-treating annually, protects your investment.
Third-party roundups put its rating in the low-4s out of 5. I couldn’t verify Amazon.ca review text, so check recent reviews for assembly clarity and panel fit. Based on the spec comparison, this is the best-balanced option for small beds and patio gardens.
Pros:
- ✅ Rigid polycarbonate panels insulate well
- ✅ Low profile handles wind nicely
- ✅ Openable vent prevents overheating
Cons:
- ❌ Fir wood needs sealing against rot
- ❌ Too short for taller seedlings
At roughly C$130-C$200, it’s the strongest value in the guide for first-time cold framers.
4. Giantex Wood Cold Frame Greenhouse — waist-high and back-friendly
The Giantex Wood Cold Frame Greenhouse stands apart because it isn’t ground-level. At about 91 × 51 × 107 cm (36 × 20 × 42 inches), it’s an elevated fir frame with a built-in slatted shelf and an adjustable roof vent.
Raising it off the ground means no kneeling when you tend seedlings, which is a real quality-of-life upgrade for anyone with knees or a back that complains. The trade-off is physics: a ground-level frame borrows heat from the soil, while an elevated one loses that thermal bonus. So treat this as a seedling and tray station, not an in-ground winter bed. For hardening off flats, it’s genuinely clever.
Roundups rate it just over 4 out of 5, with its ergonomic design cited most often. Because I couldn’t confirm full review text, look closely at comments on shelf stability and how well the panels seal in wind.
Pros:
- ✅ Elevated design saves your back
- ✅ Built-in shelf holds seed trays
- ✅ Adjustable roof vent for airflow
Cons:
- ❌ Loses ground warmth from being raised
- ❌ Needs sealing and annual wood care
Expect around C$150-C$230; it’s strong for container gardeners, though in-ground growers get more from a ground-level frame.
5. Backyard Discovery Aggie — the lid that thinks for itself
The Backyard Discovery Aggie is a 122 × 61 cm (4 × 2 ft) cedar frame with a temperature-activated polycarbonate lid and mesh drainage. Roundups also cite a five-year warranty, though confirm that on the current Amazon.ca listing.
The auto-vent lid is the star. A passive opener rises as the box heats up and settles as it cools, so you’re not racing home at lunchtime to rescue your seedlings from a surprise sunny day. Cedar naturally resists rot, which means less annual maintenance than fir. Meanwhile, mesh drainage keeps soil from turning into a bog during spring melts.
Roundup reviewers describe it as feeling solid and stable once assembled. I couldn’t verify Amazon.ca review text, so check recent reviews for lid-opener reliability in cold weather. Based on specs alone, this suits busy gardeners who value automation.
Pros:
- ✅ Auto-vent lid prevents seedling cook-offs
- ✅ Rot-resistant cedar needs little upkeep
- ✅ Built-in drainage for wet springs
Cons:
- ❌ Noticeably pricier than fir models
- ❌ Fixed size limits large plantings
At roughly C$250-C$380, it earns its place by saving you daily babysitting.
6. Palram Canopia Plant Inn — rust-proof, raised and storage-ready
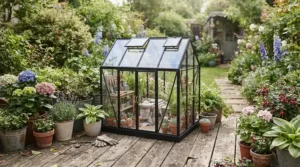
The Palram Canopia Plant Inn is a 116 × 116 cm (about 4 × 4 ft) raised cold frame with a rust-resistant aluminum frame, polycarbonate panels, a hinged lid with five positions and internal drainage. There’s built-in storage underneath. The UK retailer listing cites a five-year warranty, so verify Canadian coverage.
The five-position lid is the sleeper feature. Fine-tuned ventilation lets you crack it just a hand-width on a cool, bright day, or open it fully for summer. Aluminum doesn’t rot, but it also doesn’t offer wood’s thermal mass, so frost-sensitive crops may need extra overnight insulation. The raised height also helps keep pests away from tender greens.
I couldn’t verify Amazon.ca reviews for this model, so read recent buyer feedback on assembly time and lid stability in wind.
Pros:
- ✅ Five lid positions for precise venting
- ✅ Rust-resistant aluminum never rots
- ✅ Storage space underneath for tools
Cons:
- ❌ Aluminum holds less heat than wood
- ❌ Larger footprint needs planning
Budget about C$330-C$480; it’s best for long-term, low-maintenance setups.
7. Juwel Biostar — premium Austrian-built heirloom
The Juwel Biostar is the splurge in this lineup. Roundups describe the Biostar 1500 as Juwel’s most durable model, and it’s built in Austria, which accounts for much of its premium price. Juwel’s cold frames use double-skin polycarbonate panels with wind-resistant ventilation clips, though you should verify exact specs for your chosen size.
Twin-wall panels trap an insulating air layer, which is the feature that matters most on a minus-5°C March night. Premium builds also tend to withstand snow loads and wind gusts that trash cheaper frames. Do the math: a frame that lasts ten-plus seasons costs less per season than a budget model replaced every three years.
Availability and variants on amazon.ca vary, and I couldn’t verify Canadian review text, so confirm stock and dimensions on the listing before ordering.
Pros:
- ✅ Twin-wall panels insulate exceptionally well
- ✅ Built to withstand wind and snow
- ✅ Long service life lowers cost per season
Cons:
- ❌ Highest upfront price here
- ❌ Amazon.ca variants and stock can vary
Expect roughly C$450-C$700; it’s worthwhile if you plan to use it for a decade or more.
✨ Don’t Miss These Top Picks!
🔍 Take your season extension to the next level with these carefully selected cold frames. Click on any highlighted item to check current pricing and availability. These tools will help you grow fresh greens and sturdy seedlings your whole family will love!
How to Choose a Cold Frame Greenhouse for Season Extension
Choosing well comes down to six decisions, in this order. The Toronto Master Gardeners guide to coldframes is a handy companion if you want a Canadian-gardener perspective.
- Decide your main job. Hardening off seedlings, winter greens and fall rescue each favour different designs. Pick the job first, the product second.
- Match glazing to your climate. Rigid polycarbonate insulates better than soft film, so colder regions should lean rigid.
- Prioritize venting. An auto-vent lid or multi-position hinge matters more than any other feature, because overheating kills more seedlings than frost does.
- Check height against your crops. Greens fit in 40 cm. Tomato and pepper seedlings need 55-60 cm or more.
- Pick your frame material. Cedar resists rot, fir needs sealing, aluminum never rots but holds less heat.
- Plan the site. A south-facing spot with the back against a wall or fence cuts wind and boosts warmth.
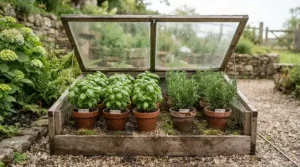
Wooden Cold Frame Greenhouse vs Polycarbonate Cold Frame: Which Wins?
This debate is a bit of a false choice, because most wooden cold frame greenhouse models still use polycarbonate glazing. The real question is whether you want a wood frame with rigid panels, or an all-polycarbonate and aluminum build. Here’s how they stack up.
| Feature | Wooden Frame (with polycarbonate panels) | All-Polycarbonate/Aluminum Build |
|---|---|---|
| Overnight heat retention | Good; wood adds thermal mass | Good with twin-wall; less thermal mass |
| Light transmission | Good | Excellent |
| Rot and weather durability | Needs sealing (fir) or naturally resistant (cedar) | Excellent; no rot or rust |
| Weight and portability | Moderate to heavy | Usually lighter |
| Maintenance | Annual treatment advised | Minimal |
| Typical price | C$130-C$380 | C$330-C$700 |
| Best for | Outsunny Wooden Cold Frame, Backyard Discovery Aggie | Palram Canopia Plant Inn, Juwel Biostar |
Wood’s advantage is thermal mass, which is why cooler regions tend to favour it. It also costs less upfront, but it does demand yearly upkeep. Aluminum-and-polycarbonate builds flip that equation: pricier on day one, almost maintenance-free afterwards. Cedar models like the VegTrug Cold Frame (cedar with 3.5 mm polycarbonate, according to the maker) show how the hybrid approach works well in practice.
My take: if you enjoy a bit of seasonal upkeep and want maximum warmth per dollar, go wood. If you hate maintenance and want a decade of service, go polycarbonate-and-aluminum.
Top Cold Frame Greenhouses Under $200 CAD
The good news: you don’t need a big budget to get started. Among the top cold frame greenhouses under $200 CAD, three models typically sit at or below that line, while a fourth hovers near it. Prices fluctuate, so always check the current listing.
The Gardzen Mini Greenhouse is the absolute cheapest, and perfect for testing the concept. The Zenport SH3212A adds 61 cm of height, a real advantage for tomato seedlings. The Outsunny Wooden Cold Frame brings rigid polycarbonate panels at the top of this range. The Giantex Wood Cold Frame often creeps just above the line, but its elevated design can justify the stretch.
What do you give up by staying under $200 CAD? Mostly automation and longevity. Expect to open and close lids by hand and to reseal wood annually. But for hardening off, early lettuce and a few weeks of frost protection, these budget frames deliver impressive value. If you’re handy, a DIY frame from salvaged windows costs even less, and extension services have promoted that approach for generations.
Cold Frame Greenhouse for Hardening Off Seedlings: A 10-Day Plan
Here’s where a cold frame earns its keep. A cold frame greenhouse for hardening off seedlings gives tender transplants a protected halfway house between your windowsill and the real world. According to University of Maryland Extension, seedling hardening should start one to two weeks before planting, and tender plants shouldn’t go outside on windy days or when temperatures dip below about 7°C (45°F).
Seedling hardening, day by day:
- Days 1-2: Place trays in the closed frame during the warmest part of the day only, then bring them inside overnight.
- Days 3-4: Crack the lid slightly and extend outdoor time to half the day.
- Days 5-6: Prop the lid wider; leave plants out all day.
- Days 7-8: Leave the frame open for most daylight hours. If overnight lows stay safely above freezing, leave seedlings in place with the lid closed at night.
- Days 9-10: Open fully by day, and by night in mild weather, then transplant on an overcast afternoon.
Two supporting habits matter. First, reduce watering slightly to slow growth, but never let plants wilt. Second, close the lid at dusk. University of Vermont Extension points out that simply shutting the lid is often enough to protect plants on a cool night, but keep a close eye on the forecast. For this job, the Giantex Wood Cold Frame and Zenport SH3212A shine, thanks to their tray-friendly heights.
Spring Planting and Fall Harvest: A Season Extension Playbook
A frame is only worth what you grow in it. Here’s a simple year-round rhythm, matched to real gardener profiles.
Spring Planting: Start Weeks Early
Spring planting is the cold frame’s showpiece. Lettuce, radishes and scallions can reach full size inside a frame before their regular outdoor planting window, according to Illinois Extension. Sow directly into the soil inside, vent on sunny days and close it before dusk. For a Toronto condo gardener with a single 1 m balcony bed, the compact Outsunny Wooden Cold Frame handles this beautifully.
Fall Harvest: Keep the Greens Coming
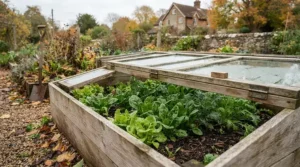
Fall harvest is where a frame pays off emotionally. Cold-hardy greens like spinach and kale shrug off cold nights under glazing, and Iowa State Extension notes you can often keep harvesting well into November. Nova Scotia gardening expert Niki Jabbour, speaking to The Weather Network, calls the cold frame a simple microclimate maker that works even in small urban gardens. For a Prairie gardener with a big vegetable bed, a larger ground-level model like the Palram Canopia Plant Inn offers room to grow.
Summer: Don’t Let It Sit Idle
Remove the lid and use the frame as a nursery bed for fall crops. Sow kale and lettuce in July so seedlings are ready to shelter in September.
Cold Frame vs Row Covers, Hoop Tunnels and Greenhouses
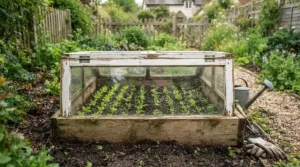
Cold frames aren’t your only option. Here’s how they compare.
| Option | Upfront Cost | Frost Protection | Winter Access | Best For |
|---|---|---|---|---|
| Cold frame | Low to moderate | Moderate | Easy, even in snow | Greens, seedlings, small spaces |
| Floating row cover | Very low | Light | Easy | Pest control and mild frost |
| Low hoop tunnel | Low to moderate | Moderate | Harder in ice and snow | Long garden rows |
| Walk-in greenhouse | High | High | Excellent | Serious year-round growers |
Row covers are the cheapest option, but Dalhousie’s extension resources note that the fabric lasts only two to three seasons. Hoop tunnels cover more ground, though a cold frame is easier to reach when ice and snow make getting inside a tunnel miserable. A walk-in greenhouse wins on capacity but costs far more. In short, if you want protection that’s affordable, durable and accessible, the cold frame is the pragmatic middle path.
Common Mistakes When Buying and Using a Cold Frame Greenhouse
Most disappointments come from a handful of avoidable errors:
- Skipping ventilation. A sealed frame on a sunny day can overheat quickly. Vent daily, even in cool weather.
- Picking the wrong spot. Face it south, with the back against a wall or fence. A shaded north-facing frame will underperform.
- Buying too short. A 40 cm frame is perfect for greens, but tomatoes will smack the lid within weeks.
- Ignoring drainage. Soggy soil chills roots and rots seedlings.
- Forgetting wood care. Untreated fir weathers fast. Seal it, and reapply yearly.
- Overbuying. If you’re only hardening off a dozen seedlings, a C$600 frame is overkill.
Features That Actually Matter (And Those That Don’t)
What matters: ventilation control (auto-vent or multi-position lids), glazing quality, frame durability, adequate height and drainage. These five decide whether your plants thrive.
What doesn’t: built-in shelves unless you’re starting trays, colour finishes, and “UV-resistant” claims on soft covers that don’t specify actual hours of protection. A pretty frame that can’t vent properly is just an expensive seedling roaster.
One cheap trick worth knowing: lining a frame with bubble wrap or old blankets adds extra insulation on the coldest nights, as noted by Family Handyman. That can stretch a mid-range frame’s performance without extra spending.
Long-Term Cost and Maintenance
A C$300 frame used for ten seasons costs C$30 per season. A C$100 frame that falls apart after three costs about C$33 per season, and you’re back shopping again. So “cheap” isn’t always cheaper.
Budget for upkeep too. Wooden frames need annual sealing, which costs only a little but takes a weekend afternoon. Aluminum models need only a seasonal wipe-down of the panels. Soft covers need replacing every few seasons, so factor that in.
Think about total value, not just sticker price. A frame that lets you harvest greens through November and plant weeks earlier in spring can offset its cost in grocery savings alone. And since it needs no electricity, there’s no running cost at all.
Frequently Asked Questions
❓ Can a cold frame greenhouse protect plants from a hard freeze?
❓ How long can seedlings stay in a cold frame?
❓ What size cold frame greenhouse should I buy?
❓ Is a cold frame greenhouse worth buying instead of building?
❓ Where should I place a cold frame in my yard?
Conclusion
A cold frame greenhouse for season extension is one of the few garden upgrades that pays you back twice a year. In spring, it gets your seedlings hardened and your first greens in the ground weeks early. In fall, it keeps the harvest going long after your neighbours’ gardens have gone brown.
If you’re just testing the idea, the Gardzen Mini Greenhouse or Zenport SH3212A are inexpensive entry points. For most gardeners, the Outsunny Wooden Cold Frame offers the best balance of insulation, size and price, especially among cold frames under $200 CAD. If automation matters, the Backyard Discovery Aggie is hard to beat. And if you want a buy-once frame, the Palram Canopia Plant Inn and Juwel Biostar are built to last.
Whichever you choose, remember the golden rule: vent early, vent often. A frame that breathes will reward you with strong seedlings and crisp greens long after the first frost.
✨ Ready to Stretch Your Growing Season? 🌱
🔍 Take your garden to the next level with these carefully selected cold frames. Click on any highlighted item to check current pricing and availability. These tools will help you grow fresh, homegrown goodness your family will love, all year long!
Recommended for You
- Cold Frame Greenhouse: 7 Best Picks For Canadian Gardens 2026
- Pop-Up Greenhouse For Balcony Gardening: 7 Best Picks 2026
- Pop-Up Greenhouse: 7 Best Picks For Canada In 2026
Disclaimer: This article contains affiliate links. As an Amazon Associate, I earn from qualifying purchases. If you purchase products through these links, we may earn a small commission at no additional cost to you.
✨ Found this helpful? Share it with your friends! 💬🤗
