
In This Article
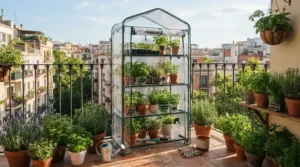
Picture a Canadian balcony in early April. There’s grey slush in the corner, frost on the patio chair, and a sun that’s making a half-hearted effort at 6°C. Now picture a slim tower of four shelves wrapped in clear plastic, packed with tomato seedlings glowing like contraband. That’s the promise of a 4-tier mini greenhouse for apartment balcony life: a vertical growing room about the size of a bookshelf, at roughly the price of a decent dinner out.
The timing makes sense. Apartment gardening has gone from quirky hobby to practical response to grocery bills, cramped condos and the very Canadian urge to squeeze a few extra weeks out of a short season. The catch is that the category is crowded with near-identical frames and covers. The differences that matter (cover material, footprint, wheel locks, ventilation) rarely make it into the product title.
So this guide does the sorting for you. You’ll find seven real models, honest analysis of what their specs mean on a wind-nipped 12th-floor balcony, a calendar for indoor seed starting, and the setup tricks no listing mentions. Every 4-tier mini greenhouse for apartment balcony pick below is priced in ranges (CAD), so check current pricing before you buy. Review insights come from public listings and roundups, not a lab test.
Quick Comparison: 7 Best Picks at a Glance
| Product | Cover | Footprint class | Price range (CAD) | Best For |
|---|---|---|---|---|
| Home-Complete 4 Tier Mini Greenhouse | Clear PVC | Standard (~69 × 48 cm) | ~C$45–C$75 | Best all-round first greenhouse |
| Outsunny 4 Tier Mini Greenhouse with Screen Roof | PE with mesh roof | Standard (~70 × 50 cm) | ~C$55–C$90 | Sunny, hot balconies |
| Miracle-Gro 4-Tier Mini Greenhouse | Clear PVC | Slim (~58 × 43 cm) | ~C$50–C$90 | Narrow balconies and tight corners |
| Ohuhu 4 Tier PE Cover Greenhouse | UV-resistant PE | Standard class | ~C$45–C$75 | Indoor seed starting on a budget |
| Alvantor 4 Tier Mini Greenhouse | Clear PVC | Standard (~69 × 48 cm) | ~C$40–C$65 | Value-focused balcony growers |
| SAZYY 4 Tier Mini Greenhouse with Screen Roof | PE with mesh roof | Standard class | ~C$50–C$80 | Breezy, ventilation-first setups |
| HomGarden 4-Tier Weatherproof Mini Greenhouse | Reinforced PE | Standard class | ~C$40–C$70 | Rain-exposed patios |
Here’s what the table says. Home-Complete is the safe default, Miracle-Gro is the one to pick when your balcony is measured in tape-measure inches rather than metres, and the two screen-roof models (Outsunny and SAZYY) earn their keep where summer sun turns a sealed plastic box into a sauna. Nearly everything lands in a C$40–C$90 band, so the real decision is fit, not price. Pick for your balcony’s width and exposure first, and let the budget settle the tie.
💬 Just one click — help others make better buying decisions too!😊
What Is a 4-Tier Mini Greenhouse for Apartment Balcony Use?
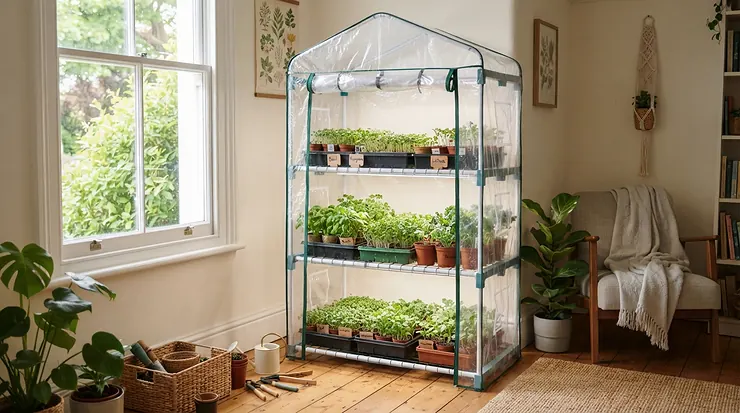
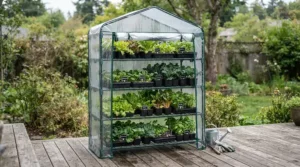
A 4-tier mini greenhouse for apartment balcony use is a freestanding steel-frame shelving unit with four wire shelves, enclosed by a zippered plastic cover. It traps warmth and humidity, shields plants from wind and rain, and fits in roughly 0.3 square metres of floor space. Most are tool-free to assemble and light enough to move.
It’s a miniature cousin of the greenhouse concept: a transparent enclosure that holds heat and moisture so plants grow in conditions milder than the surrounding air. The mini version trades walking room for portability and price. You can’t step inside, but you can roll it indoors for seed starting in March and onto the balcony by May.
That flexibility is the whole point. Where a traditional greenhouse needs a yard and a permit conversation, this one needs a patch of floor and a reasonably level surface.
Top 7 4-Tier Mini Greenhouses for Apartment Balcony Growers: Expert Analysis
Quick note on method. The specs below come from retailer and manufacturer listings, and the review themes are aggregated from public listings and roundups. None of it is hands-on testing, and availability on Amazon.ca changes, so confirm the listing before you buy.
1. Home-Complete 4 Tier Mini Greenhouse — the dependable all-rounder
Home-Complete’s formula is simple and it works: a tubular steel frame, a clear PVC cover and locking wheels in a 27 × 19 × 63 in (about 69 × 48 × 160 cm) package.
Shelves are rated around 24 lb (roughly 11 kg) each. That’s plenty for seed trays and 10 cm pots, but marginal for a mature tomato in a big container, so heavy stuff goes on the bottom tier. The wheels are the sleeper feature. Being able to roll a loaded unit through a patio door when a cold snap arrives beats lifting it.
This suits first-timers who want one proven layout rather than a spec-sheet research project. Reviewers repeatedly praise how stable and portable it feels for the price and how quickly it goes together, with one roundup reporting about 15 minutes. The common gripes are a cover that looks short until the factory wrinkles relax, and zippers that need gentle handling.
Pros:
- ✅ Locking wheels make seasonal moves painless
- ✅ Tool-free assembly in about 15 minutes
- ✅ Clear PVC maximizes light for seedlings
Cons:
- ❌ Zipper durability is a recurring watch-point
- ❌ Cover can look snug until it settles
Expect roughly C$45–C$75. For a first 4-tier mini greenhouse for apartment balcony use, it’s hard to beat on value.
2. Outsunny 4 Tier Mini Greenhouse with Screen Roof — best for sun-baked balconies
The headline here is the screen roof: a mesh panel in the top that lets hot air escape instead of cooking your lettuce.
The specs (about 27.6 × 19.7 × 62.2 in, or 70 × 50 × 158 cm, with a high-strength PE cover and roll-up zipper door) are broadly standard. The mesh roof is the real difference. On a south- or west-facing balcony, a sealed cover can climb well past what seedlings tolerate by midday, and passive venting is the cheapest cooling system there is. It’s also stocked at Canadian retailers such as Best Buy Canada, which makes returns and replacement covers less of a trans-Pacific adventure.
I’d steer this toward growers with strong afternoon sun, or anyone who tends to forget to open the door before work. I couldn’t verify a large enough review sample for this exact model to summarize it, so read the most recent 1–3 star reviews on the listing. Budget PE covers generally draw complaints about thin plastic in wind.
Pros:
- ✅ Mesh roof vents heat passively
- ✅ Roll-up zipper door for easy access
- ✅ Sold through Canadian retailers
Cons:
- ❌ Mesh roof lets some rain in
- ❌ PE cover may be thinner than premium options
Budget about C$55–C$90. Worth the premium when your balcony faces south or west.
3. Miracle-Gro 4-Tier Mini Greenhouse — slimmest footprint for narrow balconies
Narrow is the selling point. At roughly 23 × 17 × 57 in (about 58 × 43 × 145 cm), this is the one that squeezes past a patio chair.
The clear PVC cover and roll-up zipper door mirror the standard formula, but the reduced footprint changes the arithmetic: fewer plants per tier, yet it leaves room to open a balcony door fully, which many condo balconies of 1.2 m depth can’t otherwise manage. Lower overall height (145 cm) also helps with wind exposure. A shorter tower has less sail area. It’s carried by Canadian retailers like BMR, which is reassuring for availability.
Think of it as the pick for tight spaces, herb gardeners and anyone running seed trays on a shoestring footprint. I couldn’t verify enough Canadian review data to summarize sentiment fairly, so treat this as spec-based analysis and check recent buyer comments before you commit.
Pros:
- ✅ Slimmest footprint in this roundup
- ✅ Lower height reduces wind exposure
- ✅ Familiar brand with Canadian retail presence
Cons:
- ❌ Fewer seedling trays fit per shelf
- ❌ Premium over similar no-name frames
Expect roughly C$50–C$90. You’re paying for the compact size and the brand, and on a narrow balcony that’s a fair trade.
4. Ohuhu 4 Tier PE Cover Greenhouse — the budget seed-starting specialist
Ohuhu’s pitch is adjustability. The shelf heights move, and that matters more than it sounds.
The listing highlights a UV-resistant PE cover, a four-tier steel frame, zipper closure and tool-free assembly. Adjustable shelf heights mean you can give a tall tomato seedling a taller bay in April, then reconfigure for squat lettuce flats. Fixed-spacing frames force you to compromise. One roundup scored it around 4.4 out of 5 and called it a strong budget choice for indoor seed starting. That figure comes from a single review site, so treat it as directional.
It’s the sensible choice if you’re starting seeds in a living room and wheeling the greenhouse onto the balcony when the weather behaves. PE covers diffuse light a little more than clear PVC, which is gentler on tender seedlings but slightly less transparent.
Pros:
- ✅ Adjustable shelf heights for tall seedlings
- ✅ UV-resistant PE cover resists sun damage
- ✅ Budget-friendly entry point
Cons:
- ❌ Cover is less crystal-clear than PVC
- ❌ Spec details vary between listings
Expect roughly C$45–C$75. Good value for seed-starting-first growers.
5. Alvantor 4 Tier Mini Greenhouse — value pick with a clear PVC cover
Alvantor undercuts the field while keeping the clear-cover formula intact. Its listing leans on the balcony-and-patio use case.
You get a transparent PVC cover, a roll-up zipper door and a steel frame at about 27 × 19 × 62 in (69 × 48 × 157 cm). Clear PVC holds warmth and humidity well, which helps early-spring cold snaps. The flip side is that it needs your attention in sun. Without venting, heat and condensation build fast, so plan to open the door daily from April on.
This is the bargain hunter’s frame, ideal if you want to test whether greenhouse growing suits you before spending more. Public review data for this exact model was thin, so I’m not going to summarize sentiment I couldn’t verify. Look at the latest buyer photos for zipper and frame-joint quality.
Pros:
- ✅ Often among the lowest prices in the category
- ✅ Clear PVC maximizes seedling light
- ✅ Standard size fits common replacement covers
Cons:
- ❌ Limited verified review data
- ❌ No built-in venting beyond the door
Expect roughly C$40–C$65. A fair low-risk start, provided you ventilate daily.
6. SAZYY 4 Tier Mini Greenhouse with Screen Roof — ventilation-first for breezy balconies
SAZYY borrows the screen-roof idea and aims it squarely at balcony growers.
The high-strength PE cover and mesh roof create a cross-ventilation setup that reduces the cooking effect in strong sun. On one large retailer’s listing the model sits around 4.2 out of 5 across a couple of hundred reviews. That’s a decent signal for a budget model, though it comes from a non-Canadian retailer. Mesh roofs have a trade-off: rain and cold wind get in more easily, so this model suits spring and summer better than shoulder-season frost protection.
It suits the grower who values airflow over absolute warmth, such as someone growing lettuce, herbs and flowers rather than heat-hungry peppers in March. If your balcony catches strong gusts, anchor the frame with a bungee to the railing.
Pros:
- ✅ Mesh roof gives passive ventilation
- ✅ Solid early review signal at a large retailer
- ✅ Light, easy to reposition
Cons:
- ❌ Less rain protection through the roof
- ❌ Not ideal for hard-frost nights
Expect roughly C$50–C$80. Best for warm-season balconies.
7. HomGarden 4-Tier Weatherproof Mini Greenhouse — reinforced cover for exposed patios
HomGarden leans on its reinforced PE cover, which is aimed at rain and weather exposure rather than showroom clarity.
A reinforced cover typically means a thicker or ribbed layer that resists tearing, which matters on a balcony where wind finds every seam. Retailer listings put this model at roughly 4 out of 5 on a couple of hundred reviews, a respectable showing in a crowded category. As with all PE-cover frames, light transmission is softer than clear PVC. That’s fine for greens and herbs, and slightly less ideal for sun-hungry seedlings in a dim north-facing window.
I’d steer this toward growers whose balcony takes real weather and who want less fuss about tearing. Anchor it either way. A 1.6 m tower catches wind like a sail.
Pros:
- ✅ Reinforced PE cover resists tearing
- ✅ Weatherproofing aimed at exposed spots
- ✅ Respectable review average on one retailer
Cons:
- ❌ Softer light than clear PVC
- ❌ Review data verified from a single retailer only
Expect roughly C$40–C$70. A solid pick for exposed spaces.
| Product | Cover | Dimensions (where listed) | Standout detail | Price range (CAD) | Best For |
|---|---|---|---|---|---|
| Home-Complete | Clear PVC | ~69 × 48 × 160 cm | Locking wheels, ~11 kg per shelf | ~C$45–C$75 | First-time growers |
| Outsunny (Screen Roof) | PE + mesh roof | ~70 × 50 × 158 cm | Passive roof venting | ~C$55–C$90 | Sunny balconies |
| Miracle-Gro | Clear PVC | ~58 × 43 × 145 cm | Slimmest footprint | ~C$50–C$90 | Narrow spaces |
| Ohuhu | UV-resistant PE | Check listing | Adjustable shelf heights | ~C$45–C$75 | Seed starting |
| Alvantor | Clear PVC | ~69 × 48 × 157 cm | Low entry price | ~C$40–C$65 | Budget buyers |
| SAZYY (Screen Roof) | PE + mesh roof | Check listing | Cross-ventilation | ~C$50–C$80 | Breezy balconies |
| HomGarden | Reinforced PE | Check listing | Weatherproof cover | ~C$40–C$70 | Rainy patios |
Reading across the table, the real split isn’t price. It’s cover type and venting. Home-Complete and Alvantor favour light and warmth; Outsunny and SAZYY favour airflow; HomGarden favours toughness. If you’re torn, match the cover to your balcony’s biggest enemy, whether that’s cold nights, midday sun or wind.
How to Choose a 4-Tier Mini Greenhouse for Apartment Balcony Spaces
- Measure the usable floor space first. Subtract the door swing and any railing planters. A 69 × 48 cm footprint is fine on a 1.5 m-deep balcony but swallows a 1 m one.
- Pick your cover. Clear PVC maximizes light and heat. PE diffuses light and usually vents better. Choose based on whether cold or heat is your bigger problem.
- Check shelf capacity. Around 11 kg per shelf is typical. Do the maths on wet soil: a damp 20 cm pot easily weighs several kilograms.
- Look for wheels and locks. Mobility turns a seasonal chore into a two-minute job.
- Count the vents. A roll-up door alone is a minimum. A mesh roof or side windows are a bonus.
- Confirm the zipper and joints. These are the first parts to fail, so skim the 1–3 star reviews.
- Plan for wind. Lower height and a way to anchor the frame beat any fancy feature on an upper-floor balcony.
For general balcony strategy beyond the greenhouse itself, CBC’s balcony-garden tips are a handy companion read.
4-Tier Mini Greenhouse vs Traditional Alternatives
| Option | Footprint | Typical cost | Weather protection | Best For |
|---|---|---|---|---|
| 4-tier mini greenhouse | ~0.3 m² | C$40–C$90 | Good (wind, rain, cool nights) | Seed starting and balcony growing |
| Windowsill pots | Almost none | Under C$30 | None outdoors | A few herbs |
| Indoor grow-light shelf | ~0.3–0.5 m² | C$100+ (with lights) | Full indoor control | Year-round indoor growing |
| Balcony raised planters | 0.5 m²+ | C$50–C$200 | Minimal | Summer vegetables |
| Cold frame | Ground-level, larger | C$50–C$150 | Good for hardy crops | Backyard gardeners |
Beyond the numbers, the mini greenhouse wins on flexibility. It’s the only option here that works as an indoor seed-starting rack in March and an outdoor shelter in May. The grow-light shelf delivers better control but costs more and uses electricity, while raised planters hold more soil but offer no protection. For apartment dwellers with one balcony and one budget, the mini greenhouse is the best generalist.
4-Tier Mini Greenhouse for Small Space Gardening: Making Every Square Metre Count
A 4-tier mini greenhouse for small space gardening works for one reason: it stacks growing area vertically. Four shelves of roughly 60 × 40 cm give you about 1 m² of effective shelf space in a 0.3 m² footprint. That’s a 3-to-1 payoff, and it’s how apartment gardening gets serious on a balcony the size of a yoga mat.
Use the tiers intelligently. Put the heaviest, tallest containers on the bottom, where they stabilize the frame. Keep leafy greens and herbs in the middle, where temperatures are steadiest. Reserve the top shelf for seed trays that want the most light and warmth. The Toronto Master Gardeners note that container vegetables bred for compact growth can set fruit with as little as five hours of direct sun, which is great news for shaded balconies.
Don’t treat it as a plant warehouse. Crowded shelves block airflow, and stale humid air invites fungus gnats and mould. Leave a finger’s width between pots, and rotate trays weekly so no seedling leans permanently toward the light.
4-Tier Mini Greenhouse with Cover for Patio: Wind, Sun and Rain
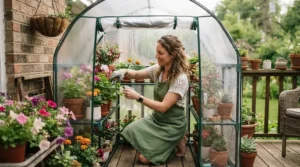
A 4-tier mini greenhouse with cover for patio use faces a tougher environment than an indoor one, and patio setup deserves some planning. Ground-level patios deal with rain splash, slugs and cold air pooling at floor level. Upper-floor balconies deal with wind, which is the real destroyer of lightweight frames.
Start with placement. Tuck the unit against a wall or railing on the lee side of the prevailing wind, and anchor it with a strap or heavy planters on the bottom shelf. Angle the door away from the wind so a gust can’t billow the cover open. Face the clear side toward the sun but not directly into a hot reflective wall, which can overheat the interior.
Patio setup also means thinking about drainage. Stand the frame on a tray or mat so runoff doesn’t stain your deck or drip to the neighbour below. Check your building rules for water runoff too. Many condo corporations have opinions about it.
4-Tier Mini Greenhouse for Seed Starting Indoors: A Canadian Calendar
A 4-tier mini greenhouse for seed starting indoors is arguably the category’s best trick. Indoor seed starting turns a sunny living room window and a cheap rack into a nursery, and the plastic cover keeps humidity high for germination.
Timing is everything, and it all counts backwards from your last frost date. For Toronto, the average last frost falls between April 30 and May 4, as the Toronto Master Gardeners note. A common rule of thumb is to start seeds six weeks before last frost, though packets vary.
A rough Canadian-friendly sequence:
- 10 weeks before last frost: peppers, leeks, onions, parsley.
- 7–8 weeks before: tomatoes.
- 6 weeks before: lettuce and cabbage-family crops.
- After the last frost: harden off and move outside.
Prairie gardeners, whose frost-free date can land near May 24, count backwards from a later date. Atlantic gardeners typically start 6–10 weeks before a late-May last frost.
Light is the real limiter. A mini greenhouse doesn’t create it. A bright south-facing window helps, but in a Canadian March a basic LED grow light clipped to a shelf makes the difference between stocky seedlings and spaghetti.
Setup Guide: Your First 30 Days with a Mini Greenhouse
Think of the first month as a shakedown cruise. Here’s the sequence that avoids the classic rookie mistakes.
Day 1: Assemble on a flat surface. Snap the frame together, lock the wheels and test the shelves with a few kilograms before loading. Do this indoors if it’s windy.
Days 2–3: Position and anchor. Choose a spot with 5–6 hours of light and some wind shelter, then tie it down. Don’t skip this step. Wind finds a loose 160 cm frame in minutes.
Week 1: Add a thermometer. A cheap indoor-outdoor thermometer on the middle shelf tells you what the interior is really doing. Check it at midday. You’ll learn quickly how hot a sealed cover gets.
Weeks 2–3: Build a venting routine. Open the door every morning once daytime temperatures exceed about 10°C, and close it at dusk. Set a phone reminder. It’s the habit that saves more seedlings than any other.
Week 4: Watering rhythm. Closed covers hold moisture, so you’ll water less than outdoors. Check the soil with a finger rather than a schedule.
Common first-month errors include overcrowding, skipping ventilation and loading too much weight on the top shelf. Avoid those and you’re ahead of most beginners.
Real-World Scenarios: Three Canadian Balcony Profiles
The condo renter in Toronto. A third-floor balcony, 1.4 m deep, south-facing, C$60 budget. The Miracle-Gro slim footprint leaves room for a chair, and the lower height copes with wind. Add a mesh-friendly ventilation habit and she’s growing herbs and cherry tomatoes by June.
The student in Edmonton. A cramped apartment, no balcony yet, but a sunny window. The Ohuhu adjustable shelves and PE cover make indoor seed starting easy, and its modest price fits a student budget. Start tomatoes in early April, then move it outside once nights stay above freezing.
The retiree in Halifax. A ground-floor patio with rain, wind and salt air. The HomGarden reinforced cover handles the weather, the wheels make seasonal moves painless, and she gets lettuce weeks before her neighbours.
The pattern: match the model to the constraint (width, budget, exposure), not to the longest feature list.
Problem → Solution Guide for Balcony Greenhouse Growers
Problem: The inside gets too hot. Open the door and any vents by mid-morning. On a south-facing balcony, consider Outsunny or SAZYY-style mesh roofs, or shade the cover with a light cloth in July.
Problem: Condensation and mould. Water in the morning, not evening, and increase airflow. A small clip-on fan indoors helps seedlings develop sturdier stems.
Problem: The frame wobbles in wind. Strap it to the railing and load heavy pots on the bottom shelf. If gusts regularly lift the cover, add clips or bungees.
Problem: Leggy seedlings. That means too little light. Add a grow light or move closer to the window.
Problem: Not sure what zone you’re in. Natural Resources Canada’s plant hardiness zone tool shows your area’s zone so you can pick crops that suit it.
✨ Don’t Miss These Exclusive Deals!
🔍 Take your apartment gardening to the next level with these carefully selected products. Click on any highlighted item to check current pricing and availability. These tools will help you create the fresh herbs, salad greens and tomato plants your family will love!
Features That Actually Matter (And Those That Don’t)
Matters: the cover material and venting, because they control temperature. Wheels with locks, because mobility changes how often you’ll actually use it. Shelf spacing, because tall seedlings need headroom. Zipper quality, because a failed zipper ruins the weather seal.
Doesn’t matter much: colour. Green versus clear affects light more than looks, but beyond that it’s cosmetic. Marketing phrases like “all-season” or “commercial-grade” are not specifications. A “heavy-duty” label means little without a stated shelf capacity or cover thickness. One listing for a PVC model quotes 0.12 mm cover thickness and 90–95% light penetration, which is the sort of concrete data worth looking for.
Ignore the extras (the included plant labels, the free gloves). Spend your attention on cover, venting and wind stability.
Common Mistakes When Buying a Mini Greenhouse
Buying by height instead of footprint. A taller frame is more wind-prone and more awkward on a narrow balcony.
Ignoring condo rules. Many buildings restrict what can sit on a balcony. Check the bylaws before you buy.
Forgetting about ventilation. The number one killer of balcony seedlings is a sealed cover in afternoon sun.
Overloading the shelves. Wet soil is heavy. Stay well under the stated 11 kg per shelf.
Expecting it to replace a grow light. A cover traps heat. It doesn’t make light.
Skipping the replacement cover plan. Covers wear out faster than frames. Choose a standard size so replacements are easy to find.
Long-Term Cost & Maintenance
| Tier | Typical models | Price range (CAD) | What you get | Best For |
|---|---|---|---|---|
| Budget | Alvantor, HomGarden | ~C$40–C$65 | Basic frame, standard cover | Testing the idea |
| Mid-range | Home-Complete, Ohuhu, SAZYY | ~C$45–C$80 | Wheels, adjustable shelves, venting | Most balcony growers |
| Premium | Outsunny, Miracle-Gro | ~C$50–C$90 | Mesh roof or slim format, brand support | Specific needs |
Total cost of ownership is mostly about the cover. Expect a PE or PVC cover to last a few seasons with careful handling, then need replacing, so budget an occasional C$15–C$30 for a replacement. Steel frames last longer, but check for rust at joints each autumn. Wipe the cover clean at season’s end and store the frame dry. A C$60 greenhouse that survives four or five seasons costs about C$12–C$15 a year, which is less than the herbs it saves.
The tier names are loose, and the prices overlap. Mid-range models offer the best feature-per-dollar balance, while the budget and premium ends suit specific situations: testing the waters, or solving a specific fit problem.
Safety, Rules and Common Sense on a Canadian Balcony
Start with the paperwork. Many condo corporations restrict balcony items, so check your declaration or house rules before installing anything. Falling objects from a balcony are a real hazard, so secure every pot and the frame itself.
Never put a space heater or open flame inside a plastic-covered frame. Plastic covers and heat sources are a fire risk. If frost threatens, move the whole unit indoors on its wheels instead. Watch your load, too. A balcony is not a loading dock, and a few wet planters add up.
Finally, consider your neighbours below. Water runoff and falling debris cause the most disputes. Place a tray under the frame and sweep regularly.
FAQ
❓ How much does a 4-tier mini greenhouse for apartment balcony use cost in Canada?
❓ Can a mini greenhouse survive a windy high-rise balcony?
❓ Do I need a grow light with a mini greenhouse indoors?
❓ Is it safe to heat a mini greenhouse on a balcony?
❓ How long do mini greenhouse covers last?
Conclusion
A 4-tier mini greenhouse for apartment balcony growing is one of the best small-space bargains in gardening. For a few dozen dollars, you get a portable nursery that starts seeds in March, shelters tender plants in May and turns a bare balcony into a working garden. The trick is matching the model to your constraint. Miracle-Gro suits narrow balconies, Outsunny and SAZYY handle sun, HomGarden copes with weather, Ohuhu and Alvantor keep costs down, and Home-Complete is the safe all-rounder.
Remember the unglamorous basics: anchor it, vent it daily and respect your building’s rules. Do those three things and any of these frames will repay you in basil, lettuce and early tomatoes.
✨ Ready to grow? Check current prices on these picks and give your balcony its best season yet! 🌱
Recommended for You
- 4-Tier Mini Greenhouse: 7 Best Picks For Canada (2026 Guide)
- Cold Frame Greenhouse For Season Extension: 7 Proven Picks (2026)
- Cold Frame Greenhouse: 7 Best Picks For Canadian Gardens 2026
Disclaimer: This article contains affiliate links. As an Amazon Associate, I earn from qualifying purchases. If you purchase products through these links, we may earn a small commission at no additional cost to you.
✨ Found this helpful? Share it with your friends! 💬🤗
