
In This Article
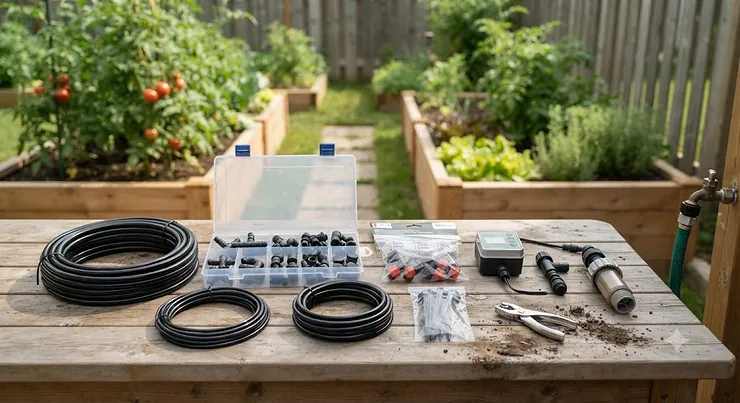
Somewhere between “I’ll just water it by hand every evening” and “I bought a $400 smart irrigation controller I never fully configured” lives the sweet spot most Canadian gardeners actually want: a drip irrigation kit under $100 CAD that just works. You screw it onto the hose bib, you lay the tubing, you walk away, and your tomatoes don’t die the one weekend you go camping.
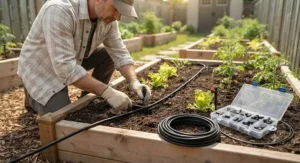
So what is a drip irrigation kit under $100 CAD? It’s a bundled watering system — tubing, emitters, connectors, and sometimes a timer or pressure regulator — priced in the sub-C$100 range that delivers water slowly and directly to plant roots instead of spraying it into the air where wind and sun burn a chunk of it off before it ever hits the soil.
That distinction matters more than most people realize. Statistics Canada reports that outdoor watering is one of the biggest discretionary uses of household water in the summer months, and a huge share of that water never reaches a root zone at all — it evaporates, runs off a driveway, or drifts sideways in the wind. Drip irrigation attacks that waste directly.
This guide breaks down seven real, currently available kits — budget options under C$40, mid-range all-in-one systems, and a couple of “buy it once” premium picks — with honest analysis of what each one is actually good at, who should skip it, and what reviewers consistently flag as the catch. We’ll also cover kit components, DIY installation, water pressure regulators, and how a starter drip irrigation kit differs from a full landscape build-out. No fluff, no invented five-star reviews — just what the spec sheets and the aggregated buyer feedback actually say.
Quick Comparison Table
| Kit | Coverage | Timer Included | Price Range (CAD) | Best For |
|---|---|---|---|---|
| Rain Bird Spot Watering Manifold Kit | 15–25 plants | No | Under C$35 | Budget patio containers |
| HIRALIY 50FT Starter Kit | ~50 ft tubing | No | C$30–C$45 | First-time DIY tinkerers |
| Raindrip R560DP Automatic System | Up to 20 plants | Yes | C$55–C$75 | Hands-off container watering |
| RainPoint IK10P Indoor Kit | 10 pots | Yes | C$55–C$70 | Small gardens, balconies, indoors |
| CARPATHEN Quick-Connect Kit | Up to 131 ft | No | C$55–C$80 | Raised garden beds |
| MIXC Quick-Connect Kit | Up to 100 ft | No | C$60–C$80 | Fast, tool-free setup |
| Rain Bird DRIPPAILQ Expansion Kit | 250 ft (self-storing) | No | C$30–C$48 | Repairing or expanding an existing system |
Looking at the spread above, the two Rain Bird entries anchor the value end of the market, while the Raindrip R560DP and RainPoint IK10P justify their higher price with an included timer that genuinely changes the day-to-day experience of owning the system. The CARPATHEN and MIXC kits sit in the middle because their quick-connect fittings save you real installation time, which for a lot of buyers is worth more than the few extra dollars. None of these cross the C$100 line even before tax, which leaves headroom for an add-on pressure regulator or extra tubing if your first layout turns out too short.
💬 Just one click — help others make better buying decisions too!😊
Top 7 Drip Irrigation Kits Under $100 CAD: Expert Analysis
1. Rain Bird Spot Watering Manifold Kit — built-in pressure regulator for under C$35
The Rain Bird Spot Watering Manifold Kit punches above its price tag by including a component most budget kits skip entirely: a 6-port staked manifold with an integrated 30 PSI pressure regulator and a fine mesh filter. That’s not a small detail. Standard residential water pressure in most Canadian homes runs 40–80 PSI, which is more than enough to blow apart cheap 1/4-inch drip tubing over time — the regulator here is doing real protective work, not just sitting on the spec sheet for show. The kit includes a dozen watering devices split between 1.0 and 2.0 GPH (roughly 3.8 and 7.6 L/h) pressure-compensating emitters plus half- and full-pattern bubblers, enough to cover 15 to 25 potted plants or a small raised bed. This is squarely a beginner’s pick: gardeners with a single patio cluster of containers, or anyone who wants to test whether drip irrigation is worth committing to before buying a bigger system. Reviewers consistently note that the quick hose connector makes it genuinely a five-minute install, though a common complaint in user reviews is that the stock 1/4-inch distribution tubing is short for anything beyond a tight container grouping, so budget extra tubing if your plants are spread out.
Pros:
- ✅ Includes a real 30 PSI pressure regulator, not just tubing
- ✅ Fine mesh filter reduces emitter clogging over the season
- ✅ Trusted brand with widely available replacement parts
Cons:
- ❌ Distribution tubing runs short for spread-out layouts
- ❌ No timer, so watering still needs a manual or separate schedule
At a price that typically lands under C$35, this is one of the easiest “test the waters” purchases in the whole drip irrigation category — check current price for exact availability, as pricing fluctuates.
2. HIRALIY 50FT Starter Kit — lightest DIY tinkering kit in this lineup
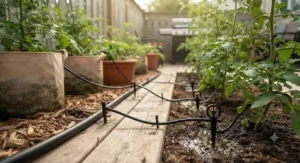
The HIRALIY 50FT Starter Kit is built around 8x5mm blank distribution tubing, meaning you cut and punch your own emitter holes wherever your plants actually sit, rather than working around pre-set spacing. That flexibility is the whole selling point: a raised bed with irregular plant spacing, a mixed container garden, or an oddly shaped balcony bed all benefit from a build-it-yourself tubing layout instead of a fixed pattern. In practice this means more setup time upfront, in exchange for a system that fits your space instead of the other way around. Based on the spec comparison against pre-punched kits like CARPATHEN or MIXC, the trade-off is honest: HIRALIY wins on customization and loses on setup speed. Aggregated buyer feedback highlights the compact carrying case and lightweight parts as strong points for balcony and patio gardeners who want to store the whole system in a shoebox over winter, while a recurring theme in reviews is that the barbed connectors take a firmer push than expected to seat properly the first time.
Pros:
- ✅ Fully customizable emitter placement for irregular layouts
- ✅ Compact, lightweight components store easily off-season
- ✅ Low entry price leaves room for add-on parts
Cons:
- ❌ Barbed fittings need firm, deliberate pressure to seat
- ❌ No pressure regulator included — pair with one separately
Priced in the low-to-mid C$30s to mid-C$40s range, this is the pick for buyers who’d rather spend an extra 20 minutes on setup than be locked into someone else’s spacing plan.
3. Raindrip R560DP Automatic Watering System — best all-in-one timer kit for containers
Raindrip has been a household name in drip irrigation since 1972, and the Raindrip R560DP Automatic Watering System is the brand’s flagship answer to “I forget to water my plants.” The kit bundles a battery-operated electronic timer with 75 feet (about 23 metres) of 1/4-inch supply tubing, 20 pressure-compensating drippers rated at 0.5 GPH (roughly 1.9 L/h), tubing stakes, and all the barbed fittings needed to build out a container watering loop covering up to 20 plants. What most buyers overlook about timer-included kits like this one is that the automation isn’t just a convenience feature — it’s a consistency feature. Manual drip watering still depends on someone remembering to turn the tap, while the built-in timer removes that human variable entirely, which matters most for vacation coverage and for gardeners who travel for work. The three-step install (connect timer and tubing to the tap, lay out tubing, attach fittings and drippers) is genuinely approachable for a first-time buyer. Reviewers consistently report the timer’s battery life holding up for a full season, though a recurring theme in aggregated feedback is that the plastic tubing stakes can work loose in looser, sandy soil types and need occasional repositioning.
Pros:
- ✅ Includes a genuine battery-powered watering timer
- ✅ Covers up to 20 containers or hanging baskets
- ✅ Simple three-step installation process
Cons:
- ❌ Tubing stakes can loosen in sandy or loose soil
- ❌ Not designed for in-ground garden beds or rows
Typically priced in the C$55–C$75 range, this is the pick for anyone whose main pain point is remembering to water, not the watering itself.
4. RainPoint IK10P Indoor Watering Kit — best value irrigation kit for small gardens and balconies
For apartment gardeners, condo balcony growers, and anyone whose entire “garden” is ten pots on a windowsill or patio ledge, the RainPoint IK10P Indoor Watering Kit is purpose-built rather than adapted from an outdoor design. It ships with a programmable timer, adjustable drip heads for each of ten pots, and thin, low-profile tubing meant to be routed indoors without looking like a construction project in your living room. This is where the “value irrigation kit for small gardens” category earns its name: you’re not paying for 100+ feet of tubing you’ll never use, you’re paying for precision on a small footprint. On paper this means less waste, both of water and of unused parts sitting in a drawer. Aggregated review sentiment sits solidly positive, with reviewers frequently mentioning the app-adjacent RainPoint ecosystem (note: some RainPoint kits are Wi-Fi enabled, others like the IK10P use a standalone timer — confirm which version you’re buying) and the low learning curve for non-gardeners. A fair number of buyers do note that the flow rate per dripper is modest, which is intentional for delicate houseplants but means outdoor container gardeners in hot climates may need to run cycles more frequently.
Pros:
- ✅ Purpose-built for 10 pots — no wasted tubing or parts
- ✅ Programmable timer suited to indoor/balcony routines
- ✅ Low-profile tubing that’s easy to hide indoors
Cons:
- ❌ Modest per-dripper flow rate for thirsty outdoor plants
- ❌ Not designed to scale up to a full backyard garden
At roughly C$55–C$70, this kit is a strong match for the specific buyer it’s built for, and a poor match for anyone with more than a dozen plants.
5. CARPATHEN Quick-Connect Drip Irrigation Kit — best pick for raised garden beds
The CARPATHEN Quick-Connect Drip Irrigation Kit is marketed by its maker as “water pressure-optimized,” and the spec sheet backs that framing up: the kit pairs 33 feet of 1/2-inch mainline tubing with roughly 98 feet of 1/4-inch distribution tubing, 24 adjustable emitters, 10 mist nozzles, and a full set of locking barbed connectors, covering layouts up to about 131 feet. That’s enough to wire multiple raised beds off a single tap connection, which is exactly the use case where this kit shines — vegetable gardeners running three or four beds who don’t want three or four separate systems. Here’s what to weigh: the quick-connect fittings genuinely cut install time, with the manufacturer and multiple reviewers citing roughly 30 minutes for full assembly and about 10 minutes to break it down for winter storage, which is meaningfully faster than barbed push-fit systems like HIRALIY’s. Reviewers consistently note the detachable, cleanable drip heads as a maintenance win over a full season, though a recurring theme in feedback is that the sheer number of small parts makes it easy to misplace pieces if you don’t keep the original packaging.
Pros:
- ✅ Covers up to 131 ft — enough for multiple raised beds
- ✅ Quick-connect fittings cut install time to about 30 minutes
- ✅ Detachable, cleanable emitter heads extend part lifespan
Cons:
- ❌ Large parts count is easy to lose track of
- ❌ No included timer or pressure regulator
Priced roughly C$55–C$80, this is the strongest multi-bed vegetable garden option in this lineup for buyers still under the C$100 ceiling.
6. MIXC Quick-Connect Drip Irrigation Kit — fastest tool-free setup in this roundup
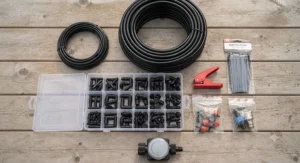
The MIXC Quick-Connect Drip Irrigation Kit leans hard into a single promise: a full watering system assembled in under ten minutes, no tools required. It pairs 1/4-inch and 1/2-inch fast-lock tubing with push-button connectors that snap together without barbed fittings, adjustable nozzles, and sprinkler-style emitters that can toggle between misting, spray, and slow-drip modes depending on the plant. Based on the spec comparison with barbed-fitting kits, the trade-off here is speed for slightly less leak-proof reliability at very high pressure — quick-connect fittings are convenient, but they’re generally not the choice for permanent underground installs. For above-ground seasonal use on a patio, deck, or garden yard, that’s not really a downside. What most buyers overlook about adjustable multi-mode emitters like these is that the “misting” setting is really meant for humidity-loving plants and germinating seeds, not general-purpose vegetable watering, so it pays to actually read which mode each emitter is set to after installation rather than assuming default settings suit every plant. Aggregated review sentiment leans positive on the 360-degree adjustability letting a single tubing run target several pots from one position, with the more common critique being that the fast-lock fittings can work loose under sustained high water pressure without a regulator.
Pros:
- ✅ Genuinely tool-free assembly in roughly 10 minutes
- ✅ 360-degree adjustable nozzles cover multiple pot angles
- ✅ Multiple flow modes for different plant types
Cons:
- ❌ Fast-lock fittings can loosen without a pressure regulator
- ❌ Less suited to permanent, buried installations
Expect a price in the C$60–C$80 band, positioning this as one of the pricier picks here, justified mainly by the setup speed.
7. Rain Bird DRIPPAILQ Repair and Expansion Kit — best for expanding or repairing an existing system
Not every buyer needs a brand-new system — plenty are trying to patch a drip line that sprung a leak last July, or add capacity to a kit they bought two seasons ago. The Rain Bird DRIPPAILQ Repair and Expansion Kit is built for exactly that scenario. It comes with 112 professional-grade universal parts stored in a portable, refillable pail, including 250 feet of self-dispensing 1/4-inch blank distribution tubing and 40 pressure-compensating, self-piercing emitters split across 0.5, 1.0, and 2.0 GPH flow rates. The standout feature here is Rain Bird’s patented emitter installation and removal tool, a small but genuinely clever accessory that turns fiddly emitter swaps into a five-second task instead of a fight with your fingernails. Here’s what most buyers overlook about repair kits: because these emitters are self-piercing and universal, this kit isn’t limited to Rain Bird lines — reviewers report using it to patch and extend Raindrip and generic drip systems as well, which makes it a smart companion purchase alongside any of the other six kits on this list rather than a standalone starter option. Reviewers consistently mention the included troubleshooting guide as unexpectedly useful for diagnosing low flow or clogging, while a fair number of buyers note that as a repair-and-expand kit, it lacks the pre-built manifolds or timers that make other entries here more turnkey out of the box.
Pros:
- ✅ Patented emitter tool makes swaps genuinely fast
- ✅ Universal parts work across multiple drip irrigation brands
- ✅ 250 ft of tubing gives serious expansion headroom
Cons:
- ❌ Not a standalone starter kit — best paired with a base system
- ❌ No timer, manifold, or pressure regulator included
Typically priced C$30–C$48, this is less a “first kit” and more the toolbox every drip irrigation owner eventually wants once week two of the growing season reveals a leak.
Kit Components Explained: What’s Actually in the Box
Every drip irrigation kit under $100 CAD on this list shares a common skeleton, and understanding it makes the spec sheets far less intimidating. The mainline is the wider tubing (usually 1/2-inch) that runs from your tap; distribution tubing (usually 1/4-inch) branches off it toward individual plants. Drip irrigation as a category works by delivering water slowly, directly to the root zone through small emitters, rather than spraying it broadly like a sprinkler. Emitters themselves come in two flavours worth knowing: pressure-compensating emitters (marked PC on packaging) deliver a consistent flow rate regardless of small pressure swings along the line, while non-pressure-compensating emitters are cheaper but water unevenly on longer runs. Connectors, tees, elbows, and end plugs are the plumbing hardware that lets you branch, turn, and cap tubing without cutting a fresh piece for every direction change. Filters and pressure regulators, when included, sit right after the tap connection and protect everything downstream — the CARPATHEN and Rain Bird manifold kits above both build this in, which is one reason they hold up well over a season.
DIY Installation: A Practical Setup Guide
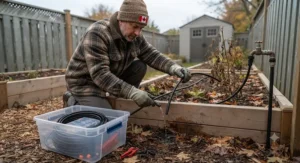
Most sub-C$100 kits follow a similar install sequence, and getting the order right avoids the majority of first-week headaches. Start by flushing your tap for a few seconds before attaching anything, clearing out any sediment that would otherwise clog your first emitters. Attach the pressure regulator and filter (if included) directly to the tap, then run your mainline tubing along the planting area, securing it every few feet with stakes so wind or foot traffic doesn’t shift it. Punch emitter holes only where plants actually sit — resist the urge to add “just in case” emitters, since every open port reduces pressure to the rest of the line. Run the system for a full cycle before planting anything nearby, checking each emitter drips steadily rather than trickling or spraying. Common first-30-days mistakes include over-tightening barbed fittings until tubing splits, forgetting to cap unused mainline ends, and setting a timer’s duration based on guesswork instead of actually checking soil moisture two inches down after a cycle. A quick pull-test on each connection point before you walk away saves a soggy surprise the next morning.
Water Pressure Regulators: The Small Part That Saves Your System
If there’s one kit component that gets skipped by budget buyers and then regretted, it’s the pressure regulator. Standard residential water pressure in Canadian homes is regularly well above the 15–30 PSI range that most drip tubing and emitters are actually engineered for. Run unregulated tap pressure — 50, 60, even 80 PSI — straight into thin drip tubing and the physics stop being forgiving: fittings blow off, tubing splits at stress points, and pressure-compensating emitters lose the “compensating” part of their job because they’re operating well outside their design range. The spec sheet won’t tell you this, but user reports across nearly every budget kit brand converge on the same failure pattern — a fitting pops loose within the first few weeks specifically because no regulator was in the loop. Kits like the Rain Bird Spot Watering Manifold above solve this by building a 30 PSI regulator directly into the manifold; kits without one, like HIRALIY, MIXC, and CARPATHEN, genuinely benefit from adding a standalone inline regulator, which typically costs well under C$15 and installs in seconds at the tap connection. It’s the cheapest insurance policy in the entire hobby.
Starter Drip Irrigation Kit Basics: What First-Time Gardeners Need to Know
A starter drip irrigation kit is deliberately smaller in scope than a full landscape system, and that’s a feature, not a limitation. The goal of a first kit isn’t to cover every square foot of your yard — it’s to prove out the concept on a manageable section (a few raised beds, a container cluster, a single garden row) before you invest in expansion parts. Reviewers who’ve owned multiple kits consistently recommend starting with something in the 50–100 foot tubing range, like the HIRALIY or CARPATHEN kits above, rather than jumping straight to a 200+ foot system. On paper, that restraint means less wasted tubing if your first layout needs revising, which it almost always does once you see how plants actually grow into a season. Expect your first setup to take 20–45 minutes depending on the kit’s connector style, and expect to make at least one adjustment — moving an emitter, adding a stake, recapping a line — within the first two weeks as you learn how your specific soil drains.
Value Irrigation Kit for Small Gardens: Making the Most of a Tight Footprint
Small gardens have different math than large yards. A sprawling 230-foot kit is overkill — and arguably worse value — for a balcony with ten containers, because most of that tubing and those extra emitters sit unused while the upfront cost stays fixed. A genuinely good value irrigation kit for small gardens, like the RainPoint IK10P above, is sized to the space rather than padded with parts count for marketing appeal. When shopping specifically for a small footprint, prioritize adjustable, low-flow emitters over high-GPH ones (container soil holds less water and floods faster), look for thin, low-profile tubing that won’t dominate a small visual space, and lean toward kits with a built-in timer since small-space gardeners are disproportionately likely to be renters or apartment dwellers without a dedicated garden tap timer setup already.
How to Choose an Affordable Drip Irrigation System
Picking the right affordable drip irrigation system comes down to matching a handful of specs to your actual garden, not chasing the kit with the most included parts. Here’s the process that consistently works:
- Measure your space first. Walk your planting area and estimate total distance from tap to farthest plant — this tells you whether a 50-foot or 130-foot kit is realistic.
- Count your plants or containers. Kits are usually rated for a plant count (10, 15, 20+); undersizing means overcrowded emitters and inconsistent watering.
- Decide if you need a timer. If you travel or simply forget to water, a timer-included kit like the Raindrip R560DP earns its higher price back fast.
- Check for a pressure regulator. If one isn’t included, budget a few extra dollars for a standalone regulator — it’s non-negotiable for tubing longevity.
- Match emitter type to plant type. Pressure-compensating emitters for longer runs or uneven ground; simple fixed-flow emitters are fine for short, flat runs.
- Consider fitting style. Quick-connect fittings (MIXC, CARPATHEN) save setup time; barbed fittings (HIRALIY) cost less and customize more freely.
- Leave a little budget headroom. Since none of these kits max out the C$100 ceiling on their own, keeping C$10–C$15 in reserve for a regulator or extra emitters avoids a second shipping wait.
✨ Don’t Miss These Exclusive Deals!
🔍 Take your garden watering routine to the next level with these carefully selected drip irrigation kits. Click on any highlighted item to check current pricing and availability. These systems will help you create a healthier, more consistent garden your family will love!
Real-World Scenarios: Which Kit Actually Fits Your Yard
Consider three fairly typical Canadian buyers. First, a condo balcony gardener with ten pots of herbs and tomatoes, watering twice a week by hand and tired of forgetting Fridays — the RainPoint IK10P fits this profile precisely, sized correctly and automated so the schedule stops depending on memory. Second, a suburban homeowner running three raised vegetable beds roughly 15 feet apart, currently dragging a soaker hose between them every evening after work — the CARPATHEN Quick-Connect kit’s 131-foot coverage and multi-bed capacity solves the exact logistics problem this gardener has, cutting a 20-minute nightly chore down to an automatic or near-automatic routine. Third, a first-year gardener with a single 4×8 raised bed and a modest C$40 budget who mostly wants to learn the basics without overcommitting — the HIRALIY 50FT Starter Kit or the Rain Bird Spot Watering Manifold both fit that entry point, letting them test the category before scaling up next season. In each case, the “best” kit isn’t the one with the most features — it’s the one whose coverage and automation level actually matches how the person already gardens.
Common Mistakes When Buying a Drip Irrigation Kit
The single most common mistake is buying based on tubing length alone without checking emitter count or plant capacity — a 200-foot kit with only 15 emitters leaves most of that tubing doing nothing useful. A close second is skipping the pressure regulator question entirely, which as covered above is the leading cause of early failures across nearly every brand. Buyers also frequently underestimate installation time, expecting a fifteen-minute job and getting frustrated forty minutes in — barbed-fitting kits in particular need patience on the first build. Another recurring pattern in aggregated reviews: buyers choose a kit built for outdoor garden beds and then try to run it indoors, discovering the flow rate and tubing profile are wrong for houseplants (or vice versa, using an indoor-sized kit like the RainPoint IK10P on an outdoor vegetable bed it was never sized for). Finally, plenty of first-time buyers skip reading which emitters ship pre-set to which flow mode, then wonder why one corner of the garden is oversaturated while another stays dry.
Drip Irrigation vs Traditional Alternatives
| Method | Water Efficiency | Setup Effort | Best For |
|---|---|---|---|
| Hand watering | Low — heavy evaporation loss | None | Small, occasional watering |
| Sprinkler | Moderate — wind/evaporation loss | Low | Lawns, large open areas |
| Soaker hose | Good — some surface loss | Low | Straight garden rows |
| Drip irrigation kit | Best — minimal evaporation/runoff | Moderate | Beds, containers, mixed plantings |
The efficiency gap here isn’t marketing spin — drip irrigation delivers water close to the root zone rather than broadcasting it across a wider area, which is precisely why it loses far less to wind drift and surface evaporation than a sprinkler does. Soaker hoses land in a reasonable middle ground since they also target the ground directly, but they lack the precision of individual emitters, so uneven soil types along the hose length can water inconsistently. For anyone gardening through a Canadian summer where municipal watering restrictions are common, this efficiency gap is more than an environmental nicety — it often determines whether you’re even allowed to water at all on a given day, a point worth understanding before the next section.
Problem → Solution: Fixing the 5 Most Common Drip Irrigation Headaches
Problem: Uneven watering across the line. This is almost always a pressure issue — install or check a pressure regulator (see the Rain Bird manifold kit above) and confirm you’re using pressure-compensating emitters on runs longer than 50 feet.
Problem: Clogged emitters. Hard water minerals and sediment are the usual culprits. A simple inline filter, like the mesh filter bundled with the Rain Bird manifold kit, catches most debris before it reaches emitters; flushing the line monthly clears the rest.
Problem: Tubing pops off fittings. Nearly always excess pressure again, or a fitting that wasn’t fully seated during install — reseat firmly and add a regulator if you haven’t already.
Problem: Plants near the tap get soaked while far plants stay dry. This is a pressure-drop-over-distance issue common on long runs without pressure-compensating emitters; the CARPATHEN and MIXC kits’ adjustable emitters help here, but swapping to PC emitters solves it structurally.
Problem: Timer isn’t triggering reliably. Check battery contacts for corrosion (a frequent culprit after a rainy stretch) and confirm the timer’s manual override actually works before troubleshooting the schedule itself.
Long-Term Cost & Maintenance: Is It Really Worth It
A drip irrigation kit under $100 CAD isn’t a one-and-done purchase — expect to budget for replacement emitters (a handful clog or crack each season), occasional tubing repair couplers, and a filter cartridge swap if your kit includes one. Even accounting for that, the total cost of ownership compares favourably against the water bill savings most municipalities and utilities associate with drip systems over sprinklers, and considerably favourably against the time cost of hand watering daily through a Canadian growing season. Most of the kits reviewed here are rated by their manufacturers for multi-season use — commonly five years or more with basic care — meaning the effective annual cost drops sharply after the first season, once the one-time tubing and connector investment is already sunk. Winterizing properly (draining lines, storing above-ground components indoors, and disconnecting timers to preserve batteries) is the single biggest factor separating a kit that lasts five seasons from one that cracks its first winter outdoors.
| Cost Factor | Typical Range (CAD) | Frequency |
|---|---|---|
| Base kit | Under C$100 | One-time |
| Replacement emitters (10-pack) | C$8–C$15 | Annual top-up |
| Standalone pressure regulator | Under C$15 | One-time (if not included) |
| Repair/expansion parts | C$30–C$50 | As needed |
Looking at the numbers above, even a fully loaded first two seasons — base kit, a regulator, and a round of replacement emitters — still lands comfortably under what a single season of professional lawn irrigation service typically costs. The Rain Bird DRIPPAILQ Repair and Expansion Kit reviewed earlier is worth budgeting for specifically because it turns “replacement emitters” into a one-time bulk purchase rather than a recurring small-pack expense.
Safety, Regulations & Watering Bylaws in Canada
Municipal watering restrictions are common across Canada during summer months, and the details matter more than most gardeners realize. Many Canadian municipalities that restrict sprinkler use on specific days or hours carve out exemptions for drip irrigation and hand watering — Metro Vancouver’s stage restrictions, for example, explicitly permit drip irrigation and edible plants to be watered by hand at any time even when sprinkler use is banned outright. That exemption alone is a strong practical argument for drip irrigation beyond the water-savings pitch: as watering restrictions have become an increasingly common annual occurrence in drought-affected regions, a drip system may be the only automated watering method still legally permitted on restriction days. Always confirm your specific municipality’s bylaw language, since exemptions vary by city and by restriction stage. On the plumbing side, if you’re connecting a drip system to an indoor tap or an irrigation line that ties into your home’s potable water supply, a code-approved backflow prevention device is worth confirming with a local plumber, particularly for any setup involving fertilizer injection or extended unattended run times — most of the hose-bib-connected kits reviewed here don’t require this, but it becomes relevant for larger permanent installs.
Frequently Asked Questions
❓ Is a drip irrigation kit under $100 CAD actually enough for a vegetable garden?
❓ Do I need a pressure regulator with every drip irrigation kit?
❓ Can I use a starter drip irrigation kit indoors for houseplants?
❓ How long does a drip irrigation kit under $100 CAD typically last?
❓ Is a drip irrigation kit worth it if my city has watering restrictions?
Conclusion
A drip irrigation kit under $100 CAD isn’t a compromise purchase — for the vast majority of Canadian container gardens, raised beds, and small yards, it’s genuinely the right-sized tool. The Rain Bird Spot Watering Manifold Kit and HIRALIY 50FT Starter Kit prove you don’t need to spend close to the C$100 ceiling to get a functional, protective setup. The Raindrip R560DP and RainPoint IK10P show what a modest jump in price buys in automation and peace of mind. And the CARPATHEN, MIXC, and Rain Bird DRIPPAILQ round things out for gardeners scaling toward multiple beds or maintaining a system for years to come. Whichever kit matches your space and habits, the fundamentals stay the same: measure your area honestly, don’t skip the pressure regulator, and give yourself a season to learn how your specific soil and plants respond before locking in a permanent layout.
Recommended for You
- Drip Irrigation Kit for Vegetable Garden: 7 Top Picks (2026)
- Oscillating vs Impact Sprinkler for Lawns: 7 Picks (2026)
- Watering Can for Large Outdoor Pots: 7 Top Picks for 2026
Disclaimer: This article contains affiliate links. As an Amazon Associate, I earn from qualifying purchases. If you purchase products through these links, we may earn a small commission at no additional cost to you.
✨ Found this helpful? Share it with your friends! 💬🤗
