
In This Article
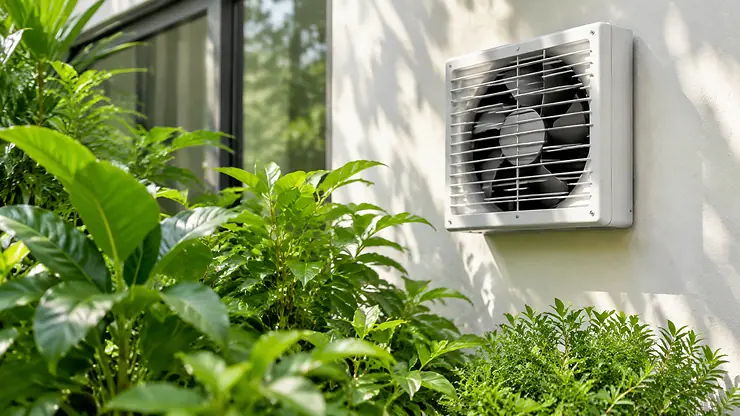
A greenhouse exhaust fan for humidity control is a wall- or roof-mounted fan, usually paired with a thermostat or humidistat, that pushes warm, moisture-laden air out of the structure while pulling drier outside air in through an intake vent. Done right, a greenhouse exhaust fan for humidity control lowers relative humidity, stops condensation on glazing, and starves the fungal diseases that love still, damp air.
Here’s the thing about moisture in a greenhouse: it’s sneaky. Plants breathe it out all day, watering adds more, and the soil keeps releasing it long after you’ve put the can away. Relative humidity is a ratio, not an absolute amount, so the same pocket of air that feels fine at 24°C can turn into a dripping, mould-friendly swamp the moment the temperature drops after sunset. For Canadian growers, that nightly swing is the whole story. Cold clear nights, damp spring mornings, a September that can’t decide whether it’s summer.
So the fan matters. But which one? A thermostat-only fan is great at cooling and mediocre at moisture. A tiny solar fan looks charming and may not move enough air to matter. A smart EC-motor fan can run a humidity program while you’re at work, and it costs accordingly.
This guide compares seven real, currently listed options across electric, smart and solar designs, plus a circulation fan to round out the setup. You’ll see how electric stacks up against solar, what to check before you buy a solar-powered unit, and how to size, place and wire the thing so it actually works. Prices below are ranges in Canadian dollars, so check current pricing before you buy.
Quick Comparison Table: 7 Fans for Greenhouse Humidity Control
| Product | Type | Airflow | Control | Price Range | Best For |
|---|---|---|---|---|---|
| iLiving 12″ Shutter Exhaust Fan | Electric exhaust | 960 CFM | Thermostat + variable speed | C$90–C$140 | Small hobby houses on a budget |
| iLiving 18″ Shutter Exhaust Fan | Electric exhaust | 1,736 CFM | Thermostat + variable speed | C$150–C$230 | Larger or leakier structures |
| AC Infinity AIRLIFT T14 | Smart electric exhaust | 1,513 CFM | WiFi temp/humidity controller, EC motor | C$250–C$380 | Data-driven growers |
| VEVOR 12″ Shutter Exhaust Fan with Temperature Humidity Controller | Electric exhaust | About 940 CFM | Built-in temp/humidity controller, 10 speeds | C$130–C$220 | Humidity-first automation |
| VEVOR Solar Powered Fan 30W | Solar exhaust | Modest (check listing) | Sun-driven, no controller | C$90–C$160 | Off-grid sheds and small houses |
| HNRLOY Solar Exhaust Fan Kit | Solar, 3-fan kit | Modest (check listing) | Sun-driven, no battery | C$80–C$140 | Daytime venting on a tight budget |
| VEVOR Greenhouse Air Circulation Fan | Electric circulation | 1,800 CFM (larger model 5,800 CFM) | LCD control, 10 speeds, 3 modes | C$110–C$200 | Moving air inside, not out |
Read the table by job, not by price. The first four fans are exhaust machines, meaning they swap damp air for outside air. The two solar kits do the same on a smaller scale. The VEVOR Greenhouse Air Circulation Fan is a different tool entirely: it keeps air moving inside so moisture can’t pool around leaves.
For genuine humidity control, the VEVOR 12″ Shutter Exhaust Fan with Temperature Humidity Controller and the AC Infinity AIRLIFT T14 are the only two here that react to moisture directly. The others respond to heat, so you’d add a separate humidistat. Budget buyers should note that the two iLiving models give you the most airflow per dollar, while the solar kits trade power for independence.
💬 Just one click — help others make better buying decisions too!😊
Top 7 Greenhouse Exhaust Fans for Humidity Control: Expert Analysis
1. iLiving 12″ Shutter Exhaust Fan with Thermostat — best entry point for small hobby houses
The iLiving 12″ Shutter Exhaust Fan is the “I just want this to work” pick. It’s a wall-mounted unit with automatic shutters, a built-in thermostat and a variable-speed controller, so you plug it in, set a temperature and let it cycle.
The headline spec is 960 CFM (roughly 1,630 m³/h). In practice, that’s enough to swap the entire air volume of a 2.4 × 3.7 m (8 × 12 ft) greenhouse about once a minute. The automatic shutters close when the fan stops, which matters on frosty nights because they stop cold air from backflowing onto your seedlings.
Based on the spec sheet, there’s one catch worth flagging: a thermostat reacts to heat, not moisture. On a cool, damp evening the thermostat may never trigger, even while humidity climbs past 90%. Pair this fan with a plug-in humidistat and the problem disappears.
I couldn’t verify a large pool of independent customer reviews for this exact model, so treat the spec-based reasoning here as the main evidence and read current buyer feedback before ordering.
Pros:
- ✅ Automatic shutters block cold backdrafts
- ✅ Variable speed plus thermostat included
- ✅ Right-sized airflow for small structures
Cons:
- ❌ Thermostat ignores humidity on cool nights
- ❌ Needs a separate intake vent you must build
Expect a price in the C$90–C$140 range. Strong value if you add a humidistat.
2. iLiving 18″ Shutter Exhaust Fan with Thermostat — muscle for larger or leakier houses
Step up to the iLiving 18″ Shutter Exhaust Fan when your greenhouse is bigger than a garden shed, or when it’s the kind of leaky, polycarbonate-and-hope structure that loses air everywhere. It carries a listed 1,736 CFM (about 2,950 m³/h) with the same thermostat and variable-speed setup as its smaller sibling.
Why does that extra push matter for moisture? Because humidity venting is a race. You want to flush a wet air mass out fast, then let the fan rest. A more powerful fan finishes the flush sooner, which means fewer minutes of cold outside air hitting plants. On paper, a unit this size can handle structures around 4.3 × 6 m (14 × 20 ft), though the supplier’s “coverage” claim is generous. Your real ceiling depends on intake size and how many tall plants block airflow.
Here’s what the spec sheet won’t tell you: bigger fans need bigger intakes. Without enough incoming air, the fan starves, strains and exhausts poorly. Budget for a louvred intake at least as large as the fan opening.
Verified customer feedback for this exact model was thin in my research, so check the current review pool.
Pros:
- ✅ High airflow clears damp air quickly
- ✅ Variable speed softens noise and draughts
- ✅ Thermostat and shutters included
Cons:
- ❌ Overkill for compact hobby greenhouses
- ❌ Demands a generously sized intake opening
Typically around C$150–C$230. Good value for mid-sized builds.
3. AC Infinity AIRLIFT T14 — WiFi humidity logic for the data-minded
The AC Infinity AIRLIFT T14 is the premium option, and it earns the label. It’s a 14-inch shutter exhaust fan with an EC motor, a WiFi temperature-and-humidity controller, and listed VPD (vapour pressure deficit) monitoring, with a rated 1,513 CFM.
EC motors matter more than they sound. They run at precisely controlled speeds and sip less power than the cheap AC motors in budget fans, which is why they can ramp up slowly instead of slamming on and off. For humidity, that means gentle, repeated nudges instead of dramatic temperature crashes.
The controller is the real draw. You can set humidity triggers, schedule night purges and watch trends from your phone. If you’re the type who enjoys charts, it’s a treat. If you just want to flip a switch, it’s more machine than you need.
One practical note for Canadian winters: confirm the controller’s operating temperature range before mounting anything near an unheated wall. Electronics hate deep cold.
I couldn’t verify independent review text for this model beyond editorial roundups, so weigh the specs and check retailer feedback.
Pros:
- ✅ Humidity-aware WiFi controller with scheduling
- ✅ EC motor runs smoothly and efficiently
- ✅ Strong airflow in a compact 14-inch frame
Cons:
- ❌ Highest price in this lineup
- ❌ App and WiFi dependence adds complexity
Expect roughly C$250–C$380. Worth it if you want automation that thinks.
4. VEVOR 12″ Shutter Exhaust Fan with Temperature Humidity Controller — humidity trigger built right in
If I had to name the best single-box answer to the keyword, it’d be the VEVOR 12″ Shutter Exhaust Fan with Temperature Humidity Controller. The product page lists about 940 CFM, an EC motor, a 10-speed adjustable wall mount design and an ETL listing, plus a controller that watches both temperature and humidity.
That controller is the point. Instead of bolting a humidistat onto a thermostat fan, you get one device that can run the fan when moisture climbs. For a hobby grower fighting condensation on cool autumn nights, that’s the difference between a fan that works and a fan that sits idle while the glazing drips.
Reviews on VEVOR’s Canadian store are mixed in an informative way. Several buyers say the thermostat works well for controlling the fan, and delivery is quick. One reviewer flagged that the controls are hard to read. Translation: expect a perfectly functional unit with a small display and a learning curve.
The ETL listing is the other comfort. It signals the unit was tested to recognised safety standards, which is exactly what you want on a wet-environment fan.
Pros:
- ✅ Built-in temperature and humidity controller
- ✅ EC motor with ten speed settings
- ✅ ETL-listed for safety peace of mind
Cons:
- ❌ Small, hard-to-read control display
- ❌ Airflow tops out near hobby-house limits
Typically C$130–C$220. Excellent value for humidity-first automation.
5. VEVOR Solar Powered Fan 30W — off-grid ventilation with an angle-adjustable panel
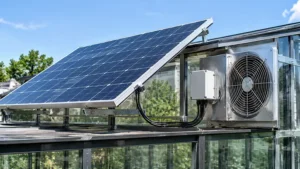
For greenhouses without nearby power, the VEVOR Solar Powered Fan 30W is the headline solar pick. The listing describes a 30W panel, two fans, 2,668 RPM and an adjustable panel angle, which matters more than it sounds.
Panel angle is the hidden hero of solar ventilation. In a Canadian winter the sun sits low, so a flat panel collects very little. Tilt it toward the low southern sun and output improves. A fixed-angle panel on a shed roof can underperform by a wide margin from November to February.
Be realistic about airflow. VEVOR’s single-fan 25W sibling is listed at 220 CFM, so expect a similar low-hundreds figure per fan. That’s useful for gentle daytime venting in a small structure and weak for flushing a big, steamy greenhouse. And because these kits run only while the sun shines, they don’t help with the night-time humidity peak, which is when mould actually strikes.
Reviews of small solar fans on retailer aggregator pages often say the weaker units feel too weak for a greenhouse, which is consistent with the physics.
Pros:
- ✅ No wiring or electrical hookup required
- ✅ Adjustable panel angle improves winter output
- ✅ Two fans spread the airflow
Cons:
- ❌ Modest airflow for larger structures
- ❌ Stops working when the sun does
Often around C$90–C$160. Fair value for off-grid daytime venting.
6. HNRLOY Solar Exhaust Fan Kit — three fans, no battery, no fuss
The HNRLOY Solar Exhaust Fan Kit takes a clever approach: a 25W panel powering three small fans, with two set to exhaust and one for intake. The listing cites 3,500 RPM, a 15-foot cord and IP67 waterproofing.
Pushing air in and out is the smart bit. A lot of solar setups forget the intake, and without replacement air a fan just strains. The intake fan gives your exhaust fans something to pull from.
The seller is upfront about the trade-off: no backup battery. The fans run on whatever the panel produces, so speed rises and falls with sunlight. On a bright July afternoon, great. On an overcast November day, expect a lazy breeze. That’s honest and useful, but it means this kit is for daytime heat and stale-air relief, not for round-the-clock humidity control.
I couldn’t verify a deep pool of independent reviews, so check current buyer feedback, especially on how the fan holds up in cold.
Pros:
- ✅ Built-in intake plus two exhaust fans
- ✅ IP67 waterproofing suits damp conditions
- ✅ No batteries to replace or protect
Cons:
- ❌ Fan speed drops on cloudy days
- ❌ No night operation at all
Roughly C$80–C$140. A tidy budget add-on, not a main system.
7. VEVOR Greenhouse Air Circulation Fan — keeps pockets of damp from forming
The VEVOR Greenhouse Air Circulation Fan doesn’t push air out. It keeps air moving inside, which is exactly what prevents humid microclimates around leaves. The listing shows an 1,800 CFM model (with a larger 5,800 CFM sibling), ten speeds, three switchable modes, LCD control and ceiling or wall mounting.
Think of it as the partner that makes your exhaust fan look smarter. Exhaust fans remove bulk moisture. A circulation fan breaks up still pockets inside the canopy, where humidity runs highest and leaves stay wet longest.
For a small hobby house, 1,800 CFM is more than you need. Run it on a low speed and it becomes a gentle, near-silent stirrer. The extra headroom is there if your greenhouse is larger or packed with tall plants like tomatoes.
I couldn’t verify detailed independent reviews for this model, so confirm current feedback on noise and durability.
Pros:
- ✅ Ten speeds and three modes for flexibility
- ✅ Ceiling or wall mounting options
- ✅ Breaks up damp pockets inside the canopy
Cons:
- ❌ Moves air around without removing moisture
- ❌ Likely oversized for very small houses
Expect around C$110–C$200. Great value as the second fan in a two-fan setup.
Practical Setup Guide: Sizing, Placing and Wiring Your Fan
Buying the fan is the easy part. Making it work is where most setups go sideways, so here’s the sequence that tends to matter.
Step 1: Work out your volume. Multiply length × width × average height. A 2.4 × 3.7 m greenhouse with a 2.1 m average height holds roughly 18.6 m³ (about 660 cubic feet).
Step 2: Match the CFM. A common rule of thumb for cooling is one full air change per minute, so that greenhouse wants roughly 660 CFM. For humidity purges, you can run shorter bursts, but the same logic applies: if the fan can’t flush the air in a few minutes, it’s too small.
Step 3: Build the intake first. Put a louvred or motorised intake low on the wall opposite the fan. Make it at least as large as the fan opening, and ideally a bit larger. An undersized intake is the number-one reason a decent fan underperforms.
Step 4: Mount the fan high. Warm, damp air rises, so the exhaust fan belongs near the ridge or upper wall, on the side away from prevailing wind.
Step 5: Choose the control. If your fan has only a thermostat, add a humidistat. If it has a controller, set humidity triggers conservatively and test them.
Step 6: Watch the first month. Check for condensation at dawn, shutter sticking after frosts, and any plants getting a cold draught from the intake. Move seedlings away from the incoming air stream and the problem usually disappears.
Small tweak, big payoff: run the fan briefly after evening watering, then let the greenhouse warm and settle.

Real-World Scenarios: Which Fan for Which Canadian Grower
These are illustrative profiles, not real customer stories. Use them to see how the logic plays out.
Scenario A: The 2.4 × 3.7 m backyard hobby house with grid power. You’re growing tomatoes, peppers and herbs, and fall condensation worries you. The strongest value is the VEVOR 12″ Controller Fan for humidity-triggered venting, paired with the VEVOR Circulation Fan on a low setting. If you’d rather save money, the iLiving 12″ plus a plug-in humidistat gets you most of the way.
Scenario B: The off-grid cottage or allotment greenhouse. No outlet, no hydro bill, and you mostly visit on weekends. The VEVOR Solar 30W or the HNRLOY Solar Kit give you daytime air exchange without wiring. Accept that night humidity needs other tactics: cracked vents, careful watering and wider plant spacing.
Scenario C: The data-loving grower with a larger polytunnel. You want trends, alerts and tight control. The AC Infinity AIRLIFT T14 earns its price here, particularly if you pair it with the iLiving 18″ on a second wall for staged ventilation.
In every case, notice the pattern: power availability, greenhouse size and your tolerance for fiddling decide the fan, not the brand name.
How to Choose a Greenhouse Exhaust Fan for Humidity Control
Here’s the short version, in order of importance:
- Match airflow to volume. Aim for roughly one air change per minute for cooling and use that as your ceiling for humidity purges. Too small and the fan never catches up.
- Choose the right trigger. A thermostat reacts to heat. A humidistat or combined controller reacts to moisture. For mould prevention, the humidity trigger matters most.
- Plan the intake. Size it at least equal to the fan opening and place it low and opposite the fan.
- Check the motor type. EC motors run quieter and more efficiently, while basic AC motors cost less.
- Look for safety listings. Seek ETL, cETL or CSA marks, especially for wet environments.
- Consider your power source. Grid power is reliable. Solar is convenient but weather-dependent.
Skip any fan that hides its CFM rating or lists coverage claims without airflow numbers. If the seller can’t tell you how much air it moves, you can’t size the system.
Solar Greenhouse Fan vs Electric Greenhouse Fan
This is the real fork in the road. Each wins in a different situation.
| Factor | Solar Greenhouse Fan | Electric Greenhouse Fan |
|---|---|---|
| Typical airflow | Low to modest | Moderate to high |
| Works at night | No (without battery) | Yes |
| Install effort | Easy, no wiring | Needs outlet or electrician |
| Operating cost | Free after purchase | Low electricity cost |
| Humidity control | Daytime only | Any hour, with controller |
| Best For | Off-grid sheds, daytime venting | Reliable humidity automation |
The takeaway is straightforward: electric fans win on power, control and night-time performance, which is why the iLiving 12″, VEVOR 12″ Controller Fan and AC Infinity AIRLIFT T14 suit serious humidity work. Solar fans, like the VEVOR Solar 30W and HNRLOY Solar Kit, win on independence and zero running cost. If you have an outlet and a mould problem, go electric. If you have sunshine, no power and a heat problem, go solar.
For the best of both, consider a hybrid: solar for daytime ventilation, a small electric fan on a humidistat for the night shift.
Buy Solar-Powered Greenhouse Fan: What to Check Before You Click
If you plan to buy solar-powered greenhouse fan hardware, a few details separate a useful kit from a decorative one.
Panel wattage versus fan count. A 25W panel feeding three fans spreads thin. A 30W panel feeding two does better per fan. Check how many fans share the panel.
Battery or no battery. The HNRLOY Solar Kit listing states there is no backup battery, which is fine for daytime but useless at night. A battery model costs more and adds a component that dislikes deep cold.
Panel angle and mounting. The VEVOR Solar 30W lists adjustable panel angle, which matters in Canadian winters when the sun hugs the horizon.
Cable length. A 4.5 m (15 ft) cord, as on the HNRLOY Solar Kit, lets you place the panel in full sun while mounting the fan where you need it.
Waterproof ratings. Look for IP-rated fans and panels, and remember that connectors are often not rated as highly as the fan itself. Keep them dry.
Finally, check the airflow number. If a listing won’t state CFM, assume it’s modest and size your expectations accordingly.
Greenhouse Circulation Fan for Airflow: The Quiet Partner
A greenhouse circulation fan for airflow does something an exhaust fan can’t: it prevents damp pockets from forming in the first place. Horizontal airflow (HAF) systems, introduced by Dr. Jay Koths at the University of Connecticut, became the standard method for greenhouse air movement. The UMass Extension fact sheet on horizontal air flow notes that before HAF, nights could differ by 10–15°F between opposite ends of a greenhouse, and it offers a sizing example of roughly 2 CFM per square foot of floor area.
For our 2.4 × 3.7 m house (about 9 m², or 96 sq ft), that rule suggests roughly 190 CFM, which means even a modest fan on a low setting does the job. That’s why the VEVOR Circulation Fan, rated at 1,800 CFM, works well when you turn it down. Circulation fans are also the right tool when outside air is too cold to vent. They move air around without sacrificing heat.
Placement matters. Aim the airflow along the length of the greenhouse in a gentle racetrack pattern, and keep it above the crop canopy. Don’t point it straight at foliage, because constant draughts stress leaves. The best circulation fans for most hobby growers are the ones you hardly notice: low, steady and silent.

Mold Prevention: A Humidity Playbook for Canadian Seasons
Mold prevention in a greenhouse is mostly about timing. The trouble hits hardest in spring and fall, when outdoor conditions resemble indoor ones and venting stops helping much. In deep winter and high summer, the contrast with outside air makes humidity easier to manage.
UConn’s Botrytis fact sheet is blunt about the fix. Botrytis is among the most common greenhouse diseases, fungicides alone cannot control it, and the answer is a combination of environment and good cultural habits. It recommends exhausting moist air and replacing it with cooler, drier outdoor air, with air movement to reduce condensation on plants.
Research backs this up. A Portuguese study on unheated tomato greenhouses found that keeping vents open overnight significantly reduced humidity and Botrytis severity compared with closing them at night.
Put that into a Canadian routine:
- Water early in the day so leaves dry before dusk.
- Run the fan briefly after watering, then let the space warm.
- Keep a circulation fan on low through the night.
- Set the exhaust fan’s humidity trigger around the point where condensation risk rises, and adjust after a week of observation.
None of it’s glamorous. All of it works.
Solar Power in the Greenhouse: What It Can and Can’t Run
Solar power is wonderful for the right jobs and frustrating for the wrong ones. Small panels run small DC fans easily. They struggle with large AC exhaust fans, which would need an inverter, a battery bank and a much larger panel array.
The honest rule: use solar power for daytime ventilation and air exchange, and use grid power for anything that needs to run at night or respond to a humidity sensor. If you want to go further, a portable power station with solar input can run a small electric fan overnight, but the cost climbs fast.
Cold is the other limiter. Panels lose less output in cold than in heat, but short days, snow cover and low sun angles shrink winter production dramatically. A solar fan that performs beautifully in July may barely move in December. Plan accordingly, tilt panels, brush off snow, and don’t count on solar for winter humidity control.
Long-Term Cost & Maintenance
The sticker price isn’t the whole story. Running costs, replacement parts and maintenance habits all matter.
| Factor | Electric Fan | Solar Fan |
|---|---|---|
| Upfront cost | C$90–C$380 | C$80–C$160 |
| Running cost | Low (electricity) | None |
| Controller needs | Often extra for humidity | Rarely available |
| Wear points | Shutters, motor bearings | Panel, connectors, small motors |
| Best long-term value | Reliable humidity control | Light-duty venting |
Electric fans cost slightly more to run but deliver consistent results, while solar fans cost nothing to operate but do less. That makes the iLiving 12″ and VEVOR 12″ Controller Fan the best long-term value for humidity work, and the VEVOR Solar 30W the best for low-maintenance independence.
Maintenance is simple. Wipe dust from blades each season, check shutters for sticking or ice, and inspect electrical connections for corrosion. One more cost to weigh: venting in winter exhausts heat you paid for. As greenhouse management guidance points out, venting works best when outside air is significantly cooler and drier than inside. Use humidity triggers rather than running the fan constantly.
Safety, Electrical and Regulatory Notes for Canadian Growers
Greenhouses are wet, and wet and electricity demand respect. Start with certification. Look for ETL, cETL or CSA marks on any mains-powered fan, as the VEVOR 12″ Controller Fan listing’s ETL claim shows. Certification doesn’t guarantee longevity, but it signals the unit was tested to recognised standards.
Use a ground-fault circuit interrupter (GFCI) on any outlet serving a greenhouse. Keep cords off wet floors, use outdoor-rated extension cords, and mount controllers where they won’t get hosed down.
If your greenhouse is a permanent structure with new wiring, check your province’s and municipality’s electrical and building requirements. Rules vary, and a licensed electrician is a smart expense for hardwired installs.
For solar kits, keep connectors dry and sheltered, since fan ratings don’t always extend to the plugs. And in any climate, keep fan guards in place, because spinning blades and curious pets or children don’t mix.
FAQ
❓ Should a greenhouse exhaust fan run overnight?
❓ Will a solar greenhouse fan work on cloudy days?
❓ Does an exhaust fan make my greenhouse too cold in winter?
❓ Is a humidistat or a thermostat better for a greenhouse exhaust fan?
❓ Is a cheap greenhouse exhaust fan good enough for humidity control?
Conclusion
Controlling moisture is less about owning the biggest fan and more about owning the right combination. A greenhouse exhaust fan for humidity control clears the bulk of the damp, a circulation fan stops it pooling, and a smart trigger decides when to act.
If you have grid power, the VEVOR 12″ Controller Fan is the most direct humidity-first answer, the iLiving 12″ and iLiving 18″ deliver strong airflow per dollar, and the AC Infinity AIRLIFT T14 adds smart control for growers who love data. If you’re off-grid, the VEVOR Solar 30W and HNRLOY Solar Kit handle daytime venting, though not the night-time humidity peak. And whatever you pick, add the VEVOR Circulation Fan on a low setting to keep leaf-level air moving.
Size the fan to your volume, build a proper intake, choose a humidity trigger and water early in the day. Do those four things and mould has a hard time getting started.
✨ Don’t Miss These Exclusive Deals!
🔍 Take your greenhouse to the next level with these carefully selected fans. Click on any highlighted item to check current pricing and availability. These tools will help you create the healthy, mould-free growing space your plants deserve! 🌱
Recommended for You
- Greenhouse Ventilation Fan: 7 Best Picks For Canada (2026)
- Electric Greenhouse Heater Vs Propane Greenhouse Heater: 7 Best 2026
- 4-Tier Mini Greenhouse For Apartment Balcony: 7 Best Picks 2026
Disclaimer: This article contains affiliate links. As an Amazon Associate, I earn from qualifying purchases. If you purchase products through these links, we may earn a small commission at no additional cost to you.
✨ Found this helpful? Share it with your friends! 💬🤗
