
In This Article
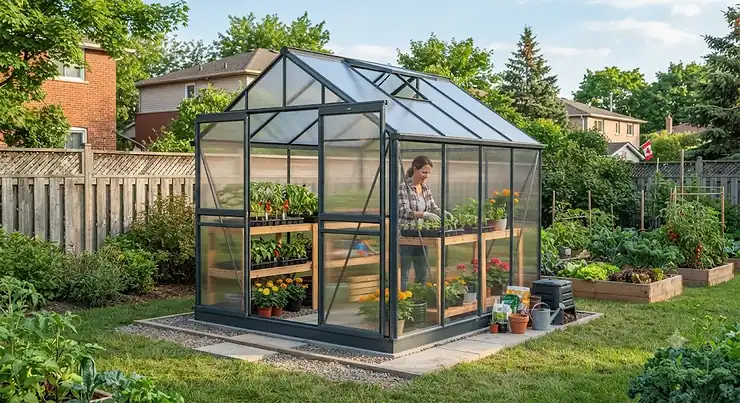
Canadian gardeners live with a strange contradiction. May can bring snow, August can bring smoke, and somewhere between the two you’re still expected to ripen a tomato. A 6×8 greenhouse kit is the small, stubborn answer to that problem. At roughly 1.8 m by 2.4 m (about 48 square feet), it tucks behind the garage, beside the fence, or onto that patch of lawn you keep meaning to put to better use than mowing practice.
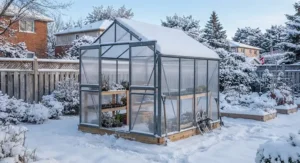
Here’s the pitch, minus the hype. A well-chosen 6×8 walk-in greenhouse for backyard use can start seedlings weeks before the last frost, shelter peppers through a cold snap, and stretch your harvest into late autumn. It won’t turn Saskatoon into Sicily. What it gives you is a buffer, and that buffer matters more now that Natural Resources Canada has updated its plant hardiness zone maps for the first time in over a decade.
The catch is that this size class is crowded with near-identical listings. Nearly all promise an aluminum frame, polycarbonate panels, a sliding door and a roof vent, and they photograph alike. They behave very differently in a March gale. This guide compares seven real options, translates each spec into what it means on your lawn, and flags where reviewers keep running into trouble. Anchoring, panel fit and instructions top that list.
One honest note before we dig in: everything here is analysis built on published specs and aggregated public reviews, not lab testing. Where a detail couldn’t be verified, we say so.
Quick Comparison: The 7 Best 6×8 Greenhouse Kits at a Glance
| Kit | Standout | Price Range (CAD)* | Best For |
|---|---|---|---|
| Palram Canopia Hybrid 6×8 | Clear walls, twin-wall roof | C$800–C$1,100 | Snowy or exposed yards |
| Palram Canopia Mythos 6×8 | Twin-wall on all sides | C$900–C$1,200 | Overwintering and cool crops |
| Outsunny 6′ x 8′ Walk-In Greenhouse | Ground stakes included | C$450–C$700 | Budget, sheltered yards |
| GarveeTech 6×8 Polycarbonate Greenhouse | Published panel weight | C$600–C$900 | Amazon.ca value seekers |
| WildVenture 6×8 Walk-In Greenhouse | Slide-in panels, tools included | C$550–C$850 | First-time builders |
| Veikous 6×8 Aluminum Greenhouse | Fully published dimensions | C$550–C$850 | Planners who measure twice |
| Yitahome 6×8 Greenhouse | Adjustable roof windows | C$450–C$700 | Mild, sheltered sites |
*Indicative ranges at the time of research. Prices and availability change constantly, so check the current price on each listing.
The table falls into three tiers. The two Palram Canopia kits sit at the premium end and lead on published snow and wind ratings. GarveeTech, WildVenture and Veikous occupy the middle. Outsunny and Yitahome compete on entry price, which usually means you’ll do more reinforcing yourself. If your yard sees real snow or wind, the price gap shrinks fast once you count the fixes budget kits tend to need.
💬 Just one click — help others make better buying decisions too!😊
Top 7 6×8 Greenhouse Kits: Expert Analysis
1. Palram Canopia Hybrid 6×8 — best all-rounder for snowy backyards
The standout is the split glazing: 4 mm twin-wall polycarbonate panels overhead and thin, clear polycarbonate on the walls. The roof diffuses July sun so leaves don’t scorch, while the clear walls let low winter light straight through, which seedlings in March genuinely appreciate.
The listing puts the footprint near 1.85 m by 2.5 m, with about 2 m of peak height, on an aluminum frame with a galvanized steel base. Stated ratings are 75 kg/m² of snow (about 15 lb/ft²) and 90 km/h winds, the latter only when paired with the separate anchoring kit. That snow rating equals roughly 30 cm of average snow, so this is a “brush the roof after a dump” greenhouse, not an “ignore it until April” one. The door is narrow enough that a full-size wheelbarrow stays outside.
Based on the spec comparison, this is the sturdier mainstream choice for gardeners who’d rather pay once. Reviewers consistently describe a long, two-person build with the occasional missing part, usually resolved by the brand’s support. Anchors and fasteners for your base aren’t supplied, a frequent complaint.
Pros:
- ✅ Clear walls maximize low winter light
- ✅ Stated 75 kg/m² snow rating
- ✅ Five-year limited warranty
Cons:
- ❌ Only one roof vent
- ❌ Anchoring kit sold separately
Expect roughly C$800–C$1,100; premium pricing, but the best long-term value here for snowy regions.
2. Palram Canopia Mythos 6×8 — twin-wall on every side for steadier temperatures
Where the Hybrid trades some insulation for light, the Mythos commits to stability. It uses 4 mm twin-wall polycarbonate on the roof and the sides, which the brand says retains twice the heat of single-layer panels while blocking 99.9% of UV. The air trapped in those twin channels slows temperature swings when an April night dips toward zero.
You get roughly 4.5 m² of growing space and about 2 m of headroom. The rust-resistant aluminum frame sits on a galvanized base, and the kit adds a roof vent, rain gutters and a lockable door with a magnetic catch. Retailers list the same 90 km/h wind and roughly 15 lb/ft² snow ratings as the Hybrid, with a five-year limited warranty.
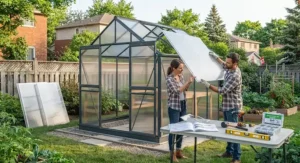
The analysis is simple. Diffused light is ideal for overwintering patio pots, cool-season greens and seedlings. Sun-hungry tomatoes and peppers may prefer the clearer walls of the Hybrid. Owners frequently praise its longevity, with one reporting use since 2013. Others say the panels slide in tightly, that builds can run about six hours, and that silicone and anchoring are wise in windy spots.
Pros:
- ✅ Twin-wall panels on roof and walls
- ✅ Diffused light reduces leaf scorch
- ✅ Owners report multi-year service life
Cons:
- ❌ Tight panel channels slow assembly
- ❌ Less direct light than clear-wall designs
Plan on roughly C$900–C$1,200; worth it if season extension and overwintering are the goal.
3. Outsunny 6′ x 8′ Walk-In Greenhouse — budget entry with ground stakes included
The stakes matter more than they sound. Many budget kits ship with nothing to hold them down, and this one includes four ground stakes, a small but sensible nod to wind.
The listing describes 4 mm polycarbonate panels, a powder-coated aluminum alloy frame, a galvanized base, a sliding door, a roof vent and a rain gutter. Overall size is about 2.5 m by 1.9 m by 2.0 m. One spec sheet lists snow capacity at 40 kg/m² (about 8 lb/ft²) and a wind level of 12 m/s, roughly 43 km/h. That is about half of what Palram Canopia lists, so treat this as a three-season structure and place it against a windbreak, as the listing itself suggests.
Reviewers frequently describe the panels as light and the frame as flexy during assembly. They also complain about picture-only instructions and report panels blowing out in storms. Others say it feels rigid once fully assembled and anchored. For sheltered yards and first-time growers, the risk is modest. For exposed prairie lots, it isn’t.
Pros:
- ✅ Lowest entry price in this group
- ✅ Sliding door saves swing space
- ✅ Ground stakes included
Cons:
- ❌ Reviewers report flimsy panels in wind
- ❌ Wordless picture instructions
Roughly C$450–C$700; solid value if you’ll reinforce it, poor value if you won’t.
4. GarveeTech 6×8 Polycarbonate Greenhouse — published panel weight helps you compare
Most sellers hide panel weight. The GarveeTech listing states 720 g/m² for its UV-protected polycarbonate, and that number lets you compare across brands. Heavier panels generally resist flexing and rattling, though it isn’t a guarantee of durability.
The rest of the spec sheet is familiar: 4 mm twin-wall panels, a corrosion-resistant aluminum alloy frame, integrated rain gutters, an adjustable roof vent and a sliding door. The sliding door is a genuine plus in narrow side yards, where a swinging door would clip a fence. The listing doesn’t publish snow or wind ratings in the excerpt reviewed, so ask yourself how much winter you’re asking it to survive.
Honest disclosure: this listing is recent, and we couldn’t verify enough independent reviews to summarize sentiment fairly. Treat it as promising but unproven. Reviews of similar slide-in kits repeatedly point to silicone-sealing panel edges and anchoring the base, and both are sensible here.
Pros:
- ✅ Published 720 g/m² panel weight
- ✅ Rain gutters for barrel collection
- ✅ Sliding door suits narrow yards
Cons:
- ❌ Limited verifiable review history
- ❌ No stated snow or wind ratings
Roughly C$600–C$900; a reasonable mid-tier bet for milder regions.
5. WildVenture 6×8 Walk-In Greenhouse — slide-in panels and tools included
Assembly is where budget greenhouses go to die, so the pitch here is friendlier. The listing promises slide-in polycarbonate panels, clear instructions and all tools in the box, with claims of faster and more secure setup. Treat those percentages as marketing until you’ve built it, but the tools-included detail is genuinely useful for first-timers.
The kit pairs 4 mm polycarbonate panels with an aluminum alloy frame, an adjustable roof vent, integrated rain gutters and a sliding door. Gutters matter more than they seem: directed into a rain barrel, they cut down on tap-water watering and keep splashback off the foundation. The vent is adjustable, but a single vent limits summer airflow, so plan on propping the door open on hot afternoons.
As with GarveeTech, we couldn’t verify enough independent reviews for a reliable sentiment summary, and we won’t invent one. The safest read is that it fits the same design family as the other slide-in kits, so the same lessons apply: anchor it, seal it and ventilate it.
Pros:
- ✅ Tools included in the box
- ✅ Slide-in panel system
- ✅ Rain gutters included
Cons:
- ❌ Unverified review base
- ❌ Speed claims are brand marketing
Roughly C$550–C$850; a sensible starter option if you value a gentler build.
6. Veikous 6×8 Aluminum Greenhouse — most transparent dimensions
Few sellers publish this much detail. The Veikous lists the exterior at 72″ by 95.1″ by 76.6″ (about 1.83 m by 2.42 m by 1.95 m), an interior of roughly 1.71 m by 2.33 m and a door near 62 cm by 167 cm. Those numbers let you plan bench layouts and a foundation before you spend a cent.
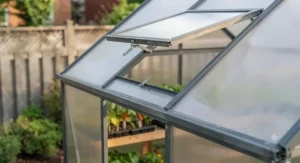
It uses a riveted aluminum frame with sliding panels and one adjustable vent, and ships in two packages that may arrive on different days. Don’t start until both boxes land.
Reviews on retailer pages are decidedly mixed. Owners praise the design, size and value, and some report a build in a few hours, while others describe about eight hours. Recurring complaints include flimsy materials, stripped bolt heads, panels that need silicone, and a greenhouse light enough to blow off an unanchored base. One owner reported a storm collapse, while another said it stood through 40 mph winds after sealing and anchoring. Several noted responsive customer service.
Pros:
- ✅ Fully published interior and door dimensions
- ✅ Riveted frame with sliding panels
- ✅ Reviewers often cite responsive support
Cons:
- ❌ Stripped bolts and flimsy parts reported
- ❌ Ships in two separate packages
Roughly C$550–C$850; good value for careful builders, risky for the impatient.
7. Yitahome 6×8 Greenhouse — adjustable roof windows for finer ventilation
Ventilation is the quiet killer of greenhouse crops, and this kit leans into it. The brand’s site describes five-position adjustable windows, which allow finer control than a simple open-or-closed vent. On a shoulder-season day that swings from 2 °C to 18 °C, that control is worth having.
The listing pairs 4 mm twin-wall polycarbonate panels with a rust-proof aluminum frame on a galvanized steel base, with a sliding door and included expansion screws for anchoring. One earlier retailer listing stated a 30 mph (about 48 km/h) wind rating, which is modest, so site it out of the worst gusts.
Community feedback is encouraging but not spotless. A past deal thread cited a 4.5-star average from customer reviews, and a five-year owner said the structure stayed sound but a few panels blew out in a windstorm, with replacements hard to find. The lesson: buy it for a sheltered site, and expect to seal panel edges.
Pros:
- ✅ Five-position adjustable roof windows
- ✅ Expansion screws included for anchoring
- ✅ Twin-wall panels for better insulation
Cons:
- ❌ Replacement panels reportedly hard to source
- ❌ Modest stated wind rating
Roughly C$450–C$700; strong value for mild, sheltered sites.
Side-by-Side Specs
Star ratings shift daily and differ by retailer, so this table tracks stated specs rather than a score.
| Kit | Panels | Frame / Base | Vent & Door | Stated Loads | Best For |
|---|---|---|---|---|---|
| Palram Canopia Hybrid 6×8 | 4 mm twin-wall roof, clear walls | Aluminum, galvanized base | 1 roof vent, hinged door | 75 kg/m² snow; 90 km/h wind (with anchor kit) | Snowy regions |
| Palram Canopia Mythos 6×8 | 4 mm twin-wall roof and walls | Aluminum, galvanized base | Roof vent, hinged door | About 15 lb/ft² snow; 90 km/h wind | Overwintering |
| Outsunny 6′ x 8′ Walk-In Greenhouse | 4 mm polycarbonate | Aluminum alloy, galvanized base | Roof vent, sliding door | 40 kg/m² snow; 12 m/s wind | Sheltered budget builds |
| GarveeTech 6×8 Polycarbonate Greenhouse | 4 mm twin-wall, 720 g/m² | Aluminum alloy | Roof vent, sliding door | Not stated | Amazon.ca value |
| WildVenture 6×8 Walk-In Greenhouse | 4 mm slide-in panels | Aluminum alloy | Roof vent, sliding door | Not stated | First builds |
| Veikous 6×8 Aluminum Greenhouse | Sliding panels | Riveted aluminum | 1 vent, 62 cm door | Not stated | Careful planners |
| Yitahome 6×8 Greenhouse | 4 mm twin-wall | Aluminum, galvanized base | Adjustable windows, sliding door | 30 mph wind (past listing) | Mild sites |
The stated loads split the field. Only the two Palram Canopia kits and Outsunny publish snow figures, and the Palram Canopia numbers are nearly double. Where a kit says “not stated,” assume a three-season design and budget for bracing. For a snowy backyard, the Palram Canopia Hybrid 6×8 remains the safest documented bet.
✨ Ready to Stretch Your Growing Season?
🔍 Take your backyard gardening to the next level with these carefully compared options. Click on any highlighted item to check current pricing and availability. A little planning now means fresher harvests your family will love!
Setup Guide: Assembling and Anchoring Your 6×8 Greenhouse Kit in One Weekend
Assembly is where reviewers vent their frustration, and most of the pain is avoidable. Here’s a build plan that borrows the hard-won lessons.
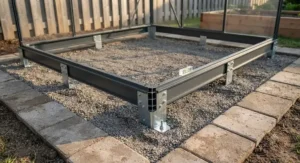
- Prepare a level base first. A firm, flat surface such as compacted gravel, pavers or a timber frame is what manufacturers recommend. Several reviewers say building the foundation took longer than the greenhouse.
- Unpack and sort. Lay out long pieces in order and group fasteners. Wait for both boxes if your kit ships in two, as the Veikous and Palram Canopia kits often do.
- Loosely fasten everything. Reviewers repeatedly warn against fully tightening bolts early, because flex helps parts line up.
- Recruit a second person. Panels catch wind like sails, especially on breezy days, and sliding them into channels is easier with a helper.
- Seal and anchor. Owners of several brands recommend silicone along panel edges to keep water out and panels seated. Then anchor through the base holes into gravel-set pavers, timber or ground stakes.
- Test the vent and door. Confirm they open freely before you fill the space with plants.
In the first 30 days, watch for three mistakes: leaving the vent closed on sunny days, skipping silicone, and stacking heavy shelves against thin walls.
Real-World Scenarios: Which 6×8 Greenhouse Kit Fits Which Gardener?
Specs only matter in context, so here are three sample profiles, built on published ratings rather than personal testing.
The exposed-prairie gardener. Budget: C$1,000 or more. Environment: open lot, strong gusts, winter snow. Frequency: year-round seedlings and greens. Best fit: the Palram Canopia Hybrid 6×8 or Palram Canopia Mythos 6×8, anchored properly, with the roof brushed clear after storms. The stated snow and wind ratings are the strongest in this group.
The first-time urban gardener. Budget: about C$500. Environment: small city lot, fences on two sides, mild winters. Frequency: spring-through-fall tomatoes and herbs. Best fit: Outsunny or Yitahome, sealed with silicone and anchored with the included stakes or screws. Modest wind ratings are acceptable here because the fences already break the gusts.
The seedling-starter on a mid-range budget. Budget: C$600 to C$850. Environment: sheltered backyard with a compacted-gravel base. Frequency: heavy March–May use. Best fit: GarveeTech or WildVenture, chosen for the sliding door and rain-gutter setup, with a small heater on a CSA-certified extension cord if nights stay frosty. Verify current reviews before buying, since neither had a deep review history.
Problem → Solution Guide: Snow, Wind and Summer Heat
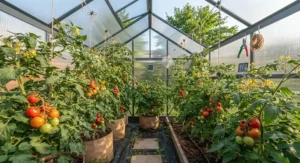
Problem 1: Roof snow. Rule of thumb from retailers: average snow weighs about 15 lb per cubic foot, so a 15 lb/ft² rating equals roughly 30 cm. Clear snow promptly rather than waiting, and consider bracing the roof ridge with lumber, which one retailer suggests. This applies to the Palram Canopia kits and, with even lower margins, the others.
Problem 2: Wind lifting panels. Silicone the panel edges, anchor the base and place the greenhouse against a fence or hedge. Reviews across nearly every brand cite panels blowing out in storms when these steps were skipped.
Problem 3: Overheating. Manufacturer guidance notes that greenhouses can run dramatically hotter than outdoors by day, then match outdoor temperatures at night. Open the vent early, prop the door on sunny days and add shade cloth in midsummer.
Problem 4: Condensation and mould. Twin-wall panels reduce cold spots, but airflow does the real work. Water in the morning, not evening, and keep the vent cracked open.
What Is a 6×8 Greenhouse Kit?
A 6×8 greenhouse kit is a flat-packed, do-it-yourself growing structure measuring about 6 by 8 feet (1.8 by 2.4 m), usually built from an aluminum frame and polycarbonate panels. It includes hardware, a door and typically a roof vent, and it’s designed for backyard gardening rather than commercial production.
Is a 6×8 Walk-In Greenhouse for Backyard Use Big Enough?
At about 4.5 m² of floor, a 6×8 walk-in greenhouse for backyard use fits a narrow aisle plus benches or beds on one or both sides. It suits seed starting, a handful of tomato or pepper plants and a few herb pots. It won’t suit sprawling squash or a serious fruit-tree ambition.
Below that size, most kits become crawl-in cold frames. Above it, prices, foundations and permit questions grow quickly. For most Canadian households, 6×8 is the sweet spot between capability and hassle.
How to Choose a 6×8 Greenhouse Kit: 7 Steps
- Start with your climate. Snow load and wind gusts should drive your choice more than colour or brand. Check your zone and local winter patterns first.
- Match panel type to your crops. Twin-wall panels diffuse light and insulate better. Clear panels admit more direct light.
- Read the stated load ratings. If snow and wind figures aren’t published, assume a three-season structure.
- Check the door and vent design. Sliding doors save swing space, and adjustable vents give finer control.
- Plan the foundation. Budget time and money for a level base and anchoring hardware.
- Scan reviews for patterns, not scores. Look for repeated complaints about fit, instructions and panel blow-out.
- Confirm local rules. Check setbacks, height limits and any permit thresholds with your municipality.
Polycarbonate Panels Explained: Twin-Wall vs Clear
Polycarbonate panels are the reason these kits are lighter and safer than glass. They’re resistant to breakage, block most UV and diffuse harsh sun. Twin-wall panels add a layer of trapped air, which the brand says holds roughly twice the heat of single-layer panels.
The trade-off is light quality. Twin-wall diffuses light, spreading it evenly and reducing scorch, but it transmits slightly less direct light than clear sheets. That’s why the Palram Canopia Hybrid 6×8 uses a hybrid approach, and why the Palram Canopia Mythos 6×8 suits cool-season crops. Panel thickness (4 mm is common) and weight (such as the GarveeTech‘s 720 g/m²) hint at how sturdy the sheets feel.
What the spec sheet won’t tell you, but reviewers repeatedly note, is that panel edges and fit matter as much as thickness. Loose panels rattle and can blow out, and water can creep into twin-wall channels if edges aren’t sealed. A small tube of silicone is the cheapest upgrade in this category.
Aluminum Frame vs Wood, Film and Glass
An aluminum frame doesn’t rust, stays light and rarely needs repainting, which is why nearly every kit in this guide uses one. The catch is gauge: thin extrusions flex during assembly and in wind, so the base and anchoring do a lot of work.
| Option | Strengths | Weak Points | Best For |
|---|---|---|---|
| Aluminum frame with polycarbonate panels | Rust-resistant, light, low maintenance | Thin frames can flex without anchoring | Most Canadian backyards |
| Cedar or wood frame with polycarbonate | Warm, natural look | Reviewers report splitting if not pre-drilled | Aesthetics-first gardeners |
| Pop-up PE film hoop house | Cheap, portable | Less insulation, film wears out | Short-season cover |
| Glass | Excellent clarity | Heavier, breakable | Permanent installs |
Looking at the comparison above, aluminum with polycarbonate panels balances weight, upkeep and safety best for a DIY kit. Wood-frame kits win on looks but ask more of the builder. Film hoop houses are fine for short, sheltered seasons, though one owner described a pop-up surviving 60 mph winds only with heavy stakes and glue.
Common Mistakes When Buying a 6×8 Greenhouse Kit
The most common mistake is buying on photos. Nearly identical listings hide big differences in gauge, panel fit and hardware. Read the stated loads, then read the negative reviews.
A close second is skipping the foundation. A greenhouse light enough to carry is light enough to blow away, and multiple owners report exactly that. Budget for gravel, pavers or timber, and anchoring hardware.
Third, buyers underestimate assembly. Several kits arrive in two packages, need two people and can take anywhere from about four to eight hours, plus foundation work.
Fourth, ignoring ventilation. One roof vent is fine for cool months but can overwhelm a small space in July. Plan on propping the door open or adding a second vent.
Finally, forgetting replacement parts. Owners of some budget kits report difficulty sourcing panels years later. If you’re buying a lesser-known brand, consider ordering spare panels upfront.
Safety, Permits and Regulations for Backyard Greenhouses in Canada
A 6×8 greenhouse covers roughly 4.5 m², which sits under the 10 m² threshold many municipalities use for accessory buildings. In Calgary, for example, garages, sheds, greenhouses and similar structures larger than 10 m² require a building permit. In St. Albert, structures under 10 m² skip the permit but must sit at least one metre from side and rear lines and stay under 3.7 m tall.
Rules vary widely. Ontario and Ottawa thresholds differ, and reports on recent changes conflict, so confirm locally. Adding electricity or plumbing can trigger permits even for tiny structures, so check before running power for lights or heaters. If you do add electrical items, look for CSA certification.
Safety matters, too. Listings warn that aluminum edges can be sharp, so wear gloves during assembly. Anchor the greenhouse to avoid tripping hazards and wind lift. Finally, keep snow off the roof, since manufacturers’ load ratings assume a properly installed, anchored structure.
Long-Term Cost & Maintenance: What a 6×8 Greenhouse Kit Really Costs
| Tier | Kits | Price Range (CAD)* | Value Verdict |
|---|---|---|---|
| Premium | Palram Canopia Hybrid 6×8, Palram Canopia Mythos 6×8 | C$800–C$1,200 | Best for snow and longevity |
| Mid-range | GarveeTech, WildVenture, Veikous | C$550–C$900 | Good if sealed and anchored |
| Budget | Outsunny, Yitahome | C$450–C$700 | Fine for sheltered sites |
*Indicative ranges; check current pricing.
Read the table as a total-cost story. Budget kits often need extras such as silicone, anchors, bracing and possibly replacement panels. Rough estimates suggest C$100–C$300 for a base and hardware, though your site will vary. Premium kits cost more upfront but lean on better published ratings and warranties.
Illustrative math: a C$1,000 kit lasting ten years costs about C$100 per year, while a C$550 kit replaced every four years works out closer to C$140 per year. Maintenance is light either way. Wipe panels each spring, check bolts, clear gutters and re-seal edges annually.
Backyard Gardening in a 6×8 Walk-In Greenhouse: What to Grow and What to Expect
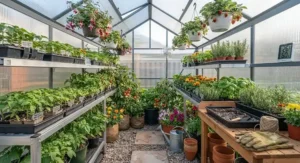
Backyard gardening gets easier under cover. Start seedlings early, protect tender crops from late frosts and extend harvests of lettuce, kale and herbs into late autumn. Peppers and tomatoes can benefit from the extra heat, though summers may require shade cloth and open vents.
Expect a working layout of a central aisle with benches or beds on one or both sides. Vertical space helps, and hanging baskets or trellises can multiply the yield. Keep watering consistent, since small spaces can swing between damp and dry quickly.
Climate is shifting what’s possible. As CBC News reported, Natural Resources Canada’s updated map moved some communities up a full zone, expanding options for gardeners. A greenhouse lets you push that further, but it doesn’t replace local knowledge. Talk to neighbours and local garden clubs about what actually thrives.
FAQ
❓ Do I need to anchor a 6x8 greenhouse kit on a gravel base?
❓ Can a 6x8 walk-in greenhouse for backyard use survive a Canadian winter?
❓ Is twin-wall polycarbonate better than clear panels for a small greenhouse?
❓ How long does it take to assemble a 6x8 greenhouse kit?
❓ How much does a 6x8 greenhouse kit cost in Canada?
Conclusion
A 6×8 greenhouse kit is one of the best-value upgrades a Canadian backyard can get, provided you match the kit to your yard rather than your wishlist. If snow and wind are real concerns, the Palram Canopia Hybrid 6×8 and Palram Canopia Mythos 6×8 offer the strongest published ratings. If your budget is tight and your yard is sheltered, Outsunny and Yitahome can work with reinforcement. The mid-tier GarveeTech, WildVenture and Veikous are worth a look if you’re willing to seal, anchor and read current reviews first.
Remember the fundamentals: build a level base, anchor the frame, seal the panel edges, vent generously and check your municipal rules. Do that, and even a modest kit can deliver a longer, richer season of backyard gardening.
✨ Ready to Grow Beyond the Frost Line?
🌱 Pick the kit that fits your yard, click any highlighted product to check current pricing and availability, and get planting sooner!
Recommended for You
- 7 Best Garden Obelisks For Climbing Roses In Canada (2026 Guide)
- Reusable Plant Clips vs Twist Ties For Gardening: 7 Best Picks 2026
- 7 Best Plant Ties For Delicate Stems In 2026 (Gentle Picks)
Disclaimer: This article contains affiliate links. As an Amazon Associate, I earn from qualifying purchases. If you purchase products through these links, we may earn a small commission at no additional cost to you.
✨ Found this helpful? Share it with your friends! 💬🤗
